Graphics Programs Reference
In-Depth Information
Once you've got your page set up with the printing layout you want, you just
need to make a few choices in the Print Job panel, so your photos look their
best when printed. Here are which buttons to click, when, and why:
Step One:
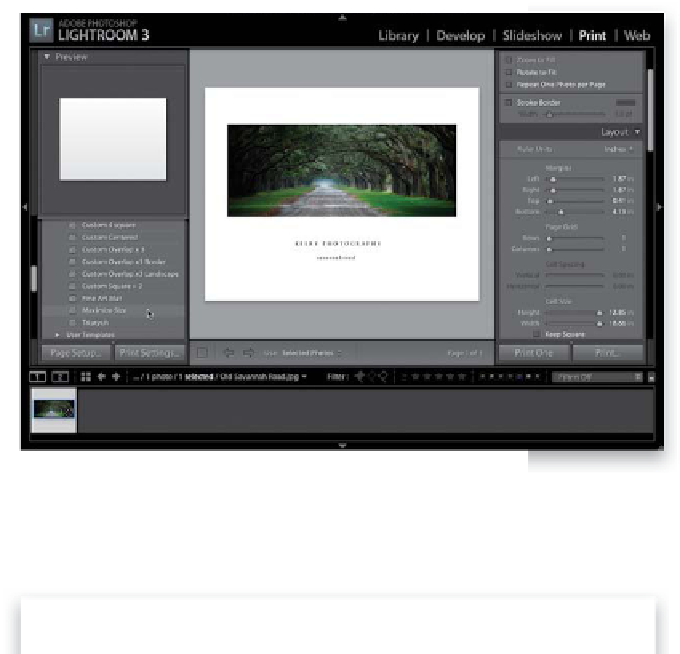
Get your page layout the way you want it
to look. In the capture shown here, I clicked
on Page Setup at the bottom of the left side
Panels area and set my page to a wide [land-
scape] orientation, and then I went to the
Template Browser and clicked on the Ma x-
imize Size template. I set my Left and Right
Margins sliders to 1.87 in, my Top Margins
slider to 0.41 in, and my Bottom Margins
slider to 4.13 in. Lastly, I added my Identity
Plate below the photo (like the one we
created earlier in this chapter). Once that's
done, it's time to choose our printing
options in the Print Job panel, at the
bottom of the right side Panels area.
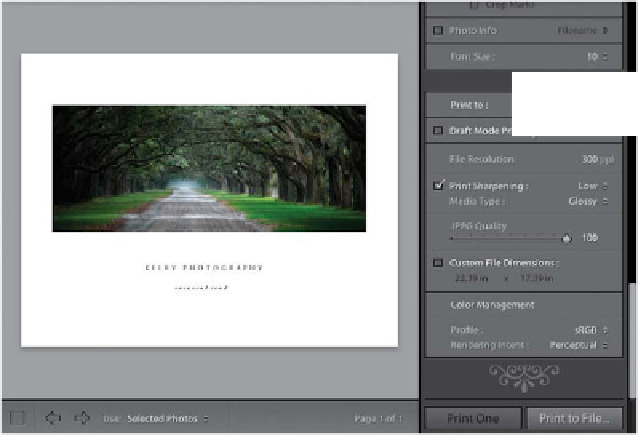
Step Two:
You have the choice of sending your image
to your printer, or just creating a high-res-
olution JPEG file of your photo layout (that
way, you could send this finished page to a
photo lab for printing, or email it to a client
as a high-res proof, or use the layout on a
website, or…whatever). You choose whether
it's going to output the image to a printer
or save it as a JPEG from the Print To pop-
up menu, at the top right of the Print Job
panel (as seen here). If you want to choose
the Print to JPEG File route, go to the next
tutorial in this chapter for details on how
to use the JPEG settings and export the file.