Graphics Programs Reference
In-Depth Information
Step Five:
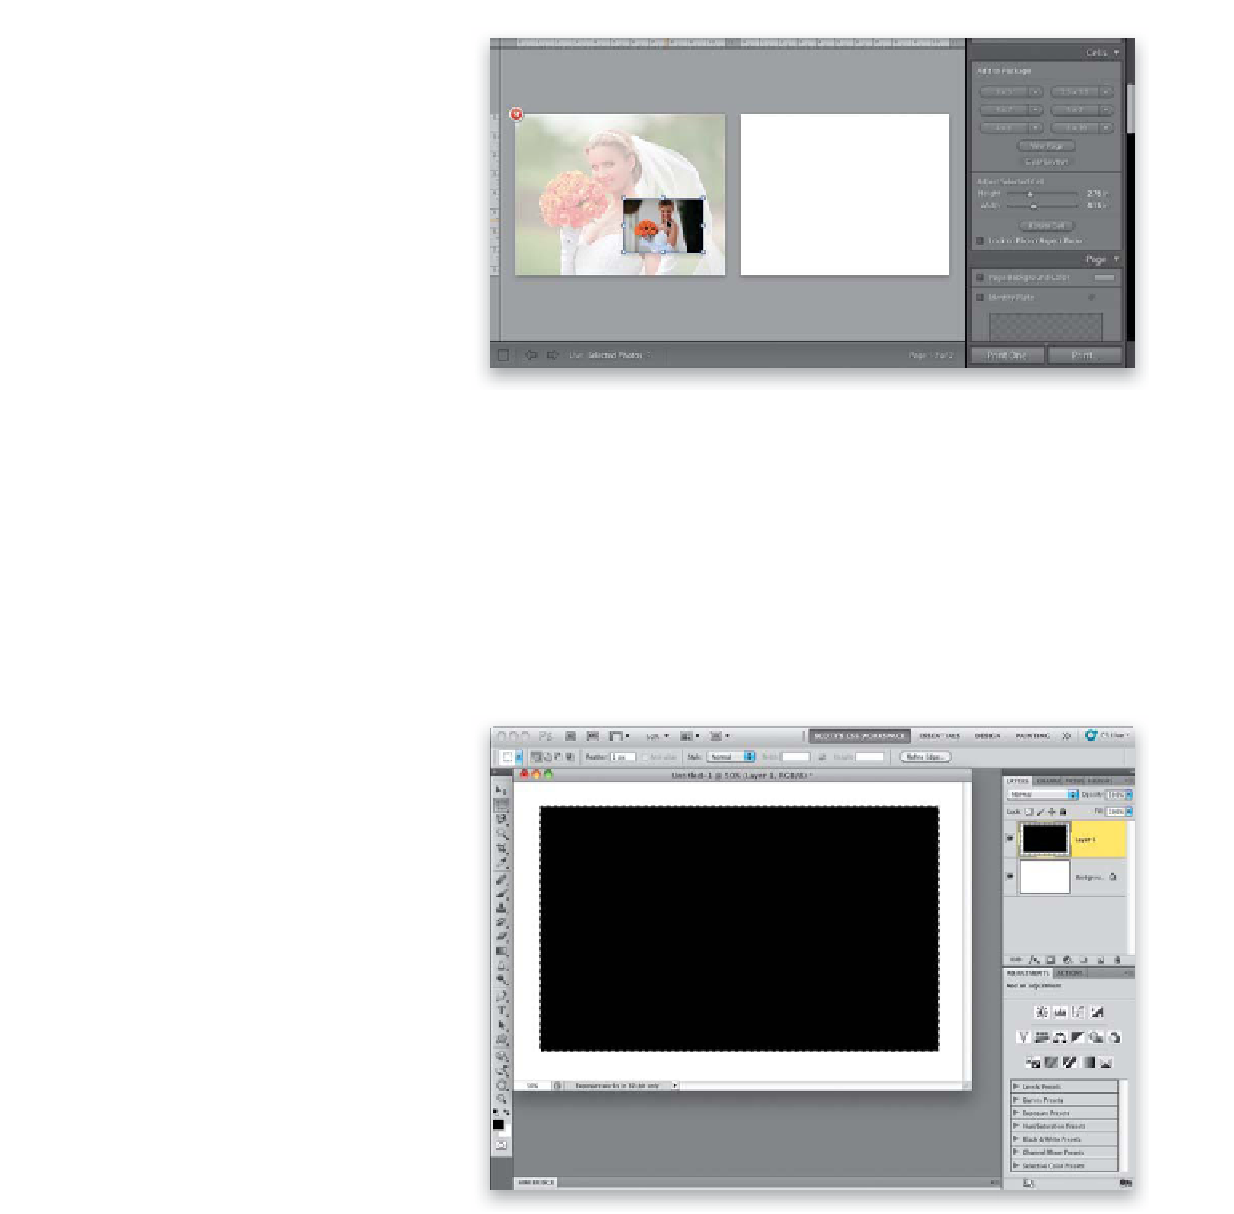
Now click-and-drag that photo from the
blank page onto the backscreened page
(as shown here), and since the photo is
coming from a different page, in a separate
cell, Lightroom doesn't try to replace the
background, but instead just puts it on
top (I know, it's weird, but this is the only
way I could come up with to make this
work). Now you can delete the blank page
on the right, so just move your cursor over
the blank page, and a red X button will
appear in the top-left corner. Click on it to
delete that extra page. Then you can drag
the photo, position it where you want,
and resize it by pressing-and-holding
the Shift key while dragging one of the
corner points in/out.
Step Six:
Now we want to have a drop shadow
behind that photo, but since Lightroom
doesn't let you add a drop shadow behind
a photo in the Print module, instead we'll
create a drop shadow using Photoshop
(or Photoshop Elements), and then import
the drop shadow as an Identity Plate (yup—
it's another workaround, but it works).
In Photoshop, create a new document
that's 6x4" at a resolution of 150 ppi (you
don't need a very high resolution for a
drop shadow). Go to the Layers panel
and click on the Create a New Layer icon.
Now, switch to the Rectangular Marquee
tool
(M)
and drag out a rectangular selec-
tion like the one you see here. Once your
selection is in place, press the letter
D
on
your keyboard to set your Foreground
color to black, then fill your selected area
with black by pressing
Option-Delete (PC:
Alt-Backspace)
. Now you can Deselect by
pressing
Command-D (PC: Ctrl-D)
.