Graphics Programs Reference
In-Depth Information
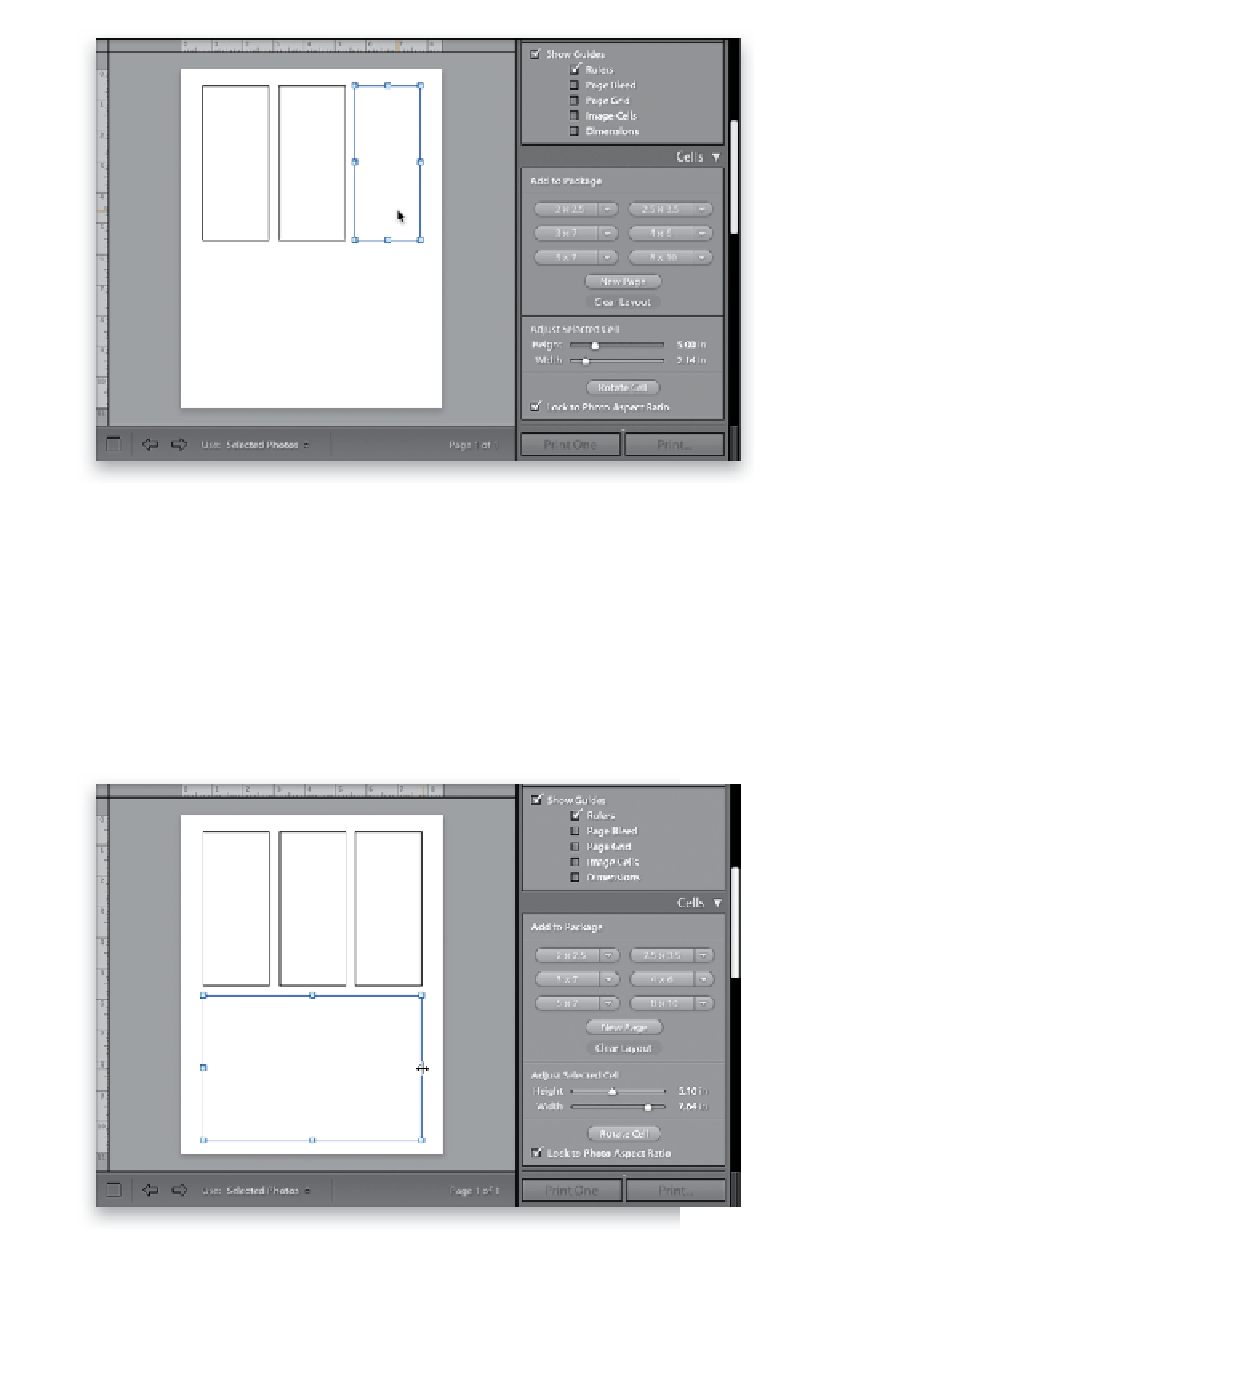
Step Three:
Let's go ahead and create a layout using
these cell buttons, so hit the Clear Layout
button to start from scratch again. Click
the 3x7 button to add a long, thin cell
to your layout, but then go down and
click the Rotate Cell button to make this
a tall, thin cell. This cell is actually pretty
large on the page, but you can resize it
by grabbing any of the handles, or going
down to the Adjust Selected Cell sliders
and choosing any size you'd like (in our
case, shrink your Height to 5.00 in). Now,
we need to make two more cells just like
this one, and the quickest way to do that
is just press-and-hold the Option (PC: Alt)
key, then click inside the cell and drag to
the right to make a copy. Do this twice
until you have three cells, like you see
here, and arrange them side by side, as
shown (as you drag these cells, you'll
feel a little snap. That's it snapping to an
invisible alignment grid that's there to
simply help you line things up. You can
see the grid by going to the Rulers, Grid
& Guides panel and turning on the check-
boxes for Show Guides and Page Grid).
Step Four:
Next, let's add a larger photo to the bot-
tom of our layout. Click the 4x6 button
and it adds a larger cell to the layout, but
it's not quite as wide as our three thin cells
above, so just grab any point and drag
until this cell is as wide as the three at the
top of the page (as seen here). The layout's
done, but before you start dragging-and-
dropping images, there are two things
you need to change first: (1) because the
cells at the top are tall and thin, you need to
turn off the checkbox for Lock to Photo
Aspect Ratio. Otherwise, when you drag-
and-drop photos into those thin cells, they
will just expand to the full size of the photo.
Continued