Graphics Programs Reference
In-Depth Information
Step Three:
If you look back at the layout in Step Two,
did you notice that the image fit the cell
top-to-bottom, but there was a gap on
either side? That's because, by default, it
tries to fit your image in that cell so the
entire image is visible. If you want to fill
the cell with your photo, go to the Image
Settings panel and turn on the Zoom to Fill
checkbox (as shown here), and now your
image fills it up (as seen). Now, of course,
this crops the image a bit, too (well, at least
with this layout it did). This Zoom to Fill
feature was designed to help you make
contact sheets, but as we go through this
chapter, I bet you'll totally start to love this
little checkbox, because with it you can
create some really slick layouts—ones
your clients will love. So, even though it
does crop the photo a bit, don't dismiss
this puppy yet—it's going to get really
useful very soon.
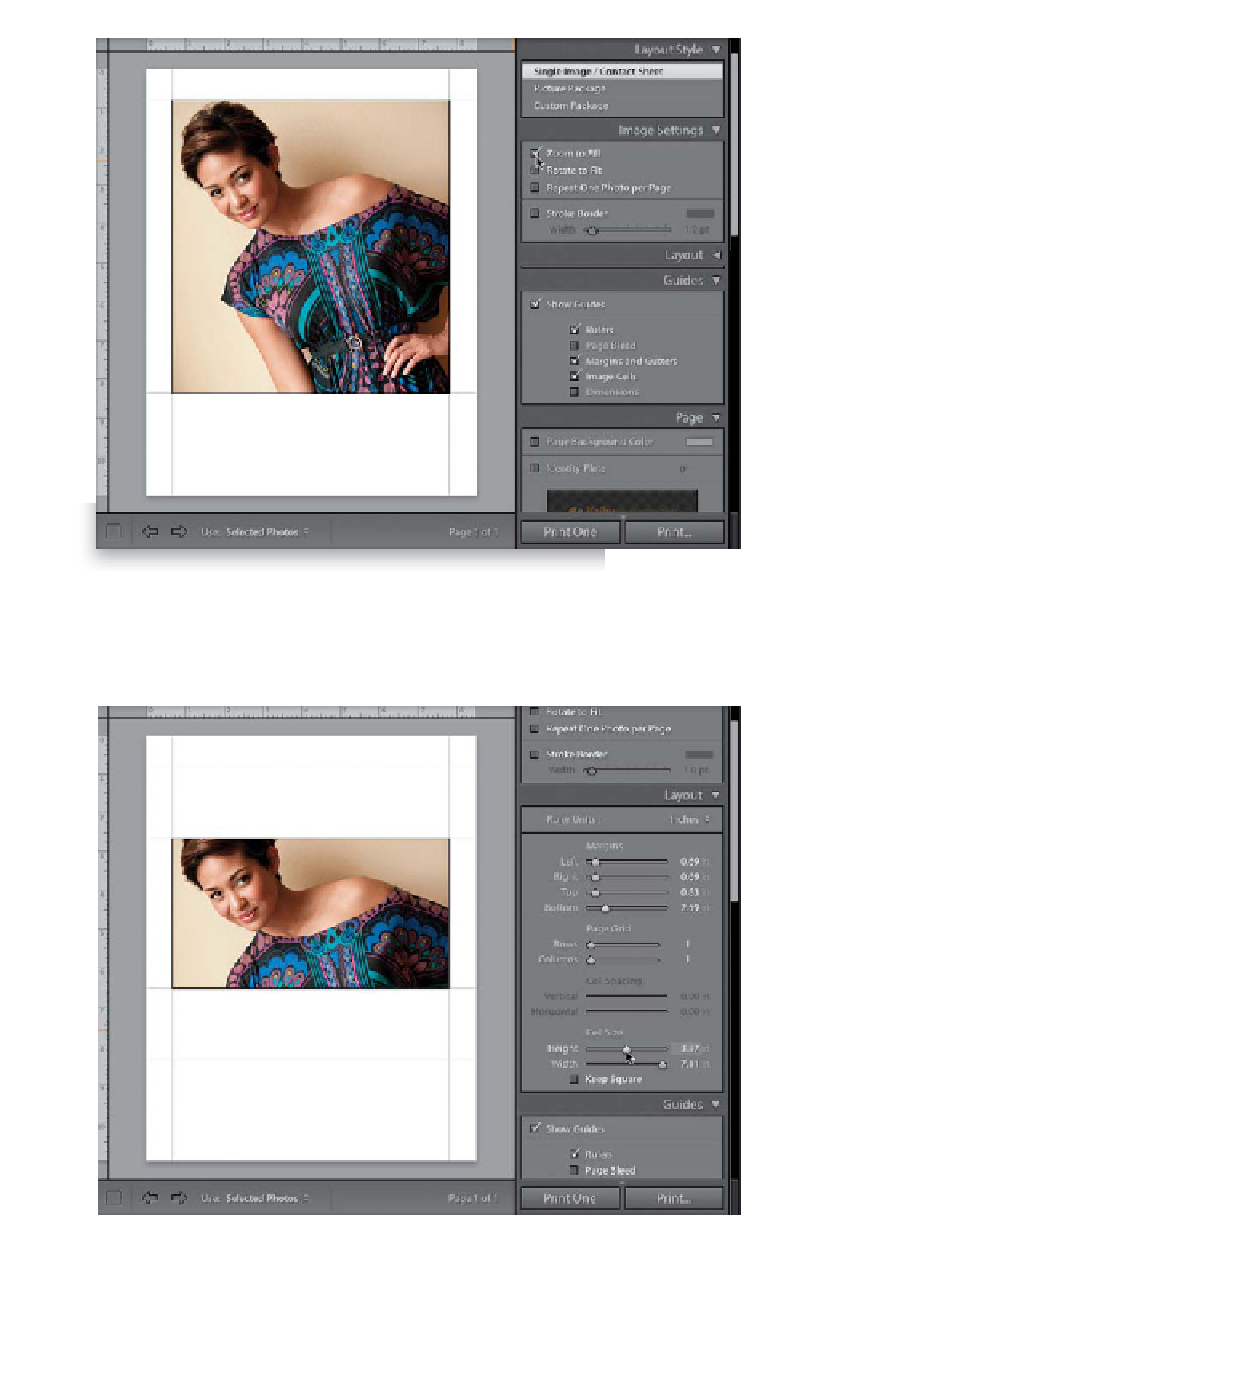
Step Four:
Now, let's work on the whole cell concept,
because if you “get” this, the rest is easy.
First, because your image is inside a cell
and you have the Zoom to Fill checkbox
turned on, if you change the size of your
cell, the size of your photo doesn't change.
So, if you make the cell smaller, it crops
off part of your image, which is really
handy when you're making layouts. To see
what I mean, go to the Layout panel, and
at the bottom of the panel are the Cell
Size sliders. Drag the Height slider to the
left (down to 3.87 in), and look at how the
top and the bottom of the cell shrink
inward, kind of giving you a “letter box”
view of your image (HD movie buffs will
totally get that analogy).
Continued