Graphics Programs Reference
In-Depth Information
Lightroom Killer Tips
> >
compare the original conversion with
any tweaks you've been making.
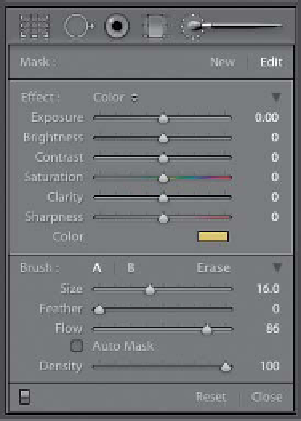
turn off the Auto Mask checkbox and
paint over the photo, and as you do,
it will retain all the detail and just apply
the duotone color.
▼
Separating Your Virtual
Black & Whites from the
Real Black & Whites
▼
Tip for Using the Targeted
Adjustment Tool (TAT )
If you're using the HSL/Color/B&W
panel's TAT to tweak your B&W image,
you already know that you click-and-
drag the TAT within your image and it
moves the sliders that control the colors
underneath it. However, you might find
it easier to move the TAT over the
area you want to adjust, and instead
of dragging the TAT up/down, just use
the
Up/Down Arrow keys
on your key-
board, and it will move the sliders for you.
If you press-and-hold the Shift key while
using the Up/Down Arrows, the sliders
move in larger increments.
▼
B&W Conversion Tip
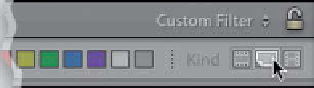
To see just your vir tual B&W copies, go up
to the Library Filter bar (if it's not visible,
press the
\ [backslash] key
), and then
click on Attribute. When the Attribute
options pop down, click on the little
curled page icon at the far right of the bar
to show just the virtual copies. To see the
real original “master” B&W files, click the
filmstrip icon just to the left of it. To see
everything again (both the virtual and
original masters), click the None button.
If you click on B&W in the HSL/Color/
B&W panel, it converts your photo to
black and white and it's kind of a flat-
looking conversion, but the idea is that
you'll use those color sliders to adjust
the conversion. The problem is, how
do you know which color sliders to
move when the photo is now in black
and white? Try this: once you've done
your conversion and it's time to tweak
those color sliders, press
Shift-Y
to
enter the Before & After split-screen
view (if it shows a side-by-side view
instead, just press Shift-Y again). Now
you can see the color image on the left
side of the screen, and black and white
on the right, which makes it much
easier to see which color does what.
▼
Getting a Before/After of
Yo u r B & W Twe a k i n g
▼
Painting Duotones
Another way to create a duotone effect
from your B&W photo is to click on the
Adjustment Brush, and then in the options
that pop down, choose Color from the
Effect pop-up menu. Now, click on the
Color swatch to bring up the color picker,
choose the color you want for your
duotone, and close the picker. Then,
You can't just press the
\ (backslash) key
to see your before image after you've
done the edits to your B&W image,
because you're starting with a color
photo (so pressing \ just gives you the
color original again). There are two ways
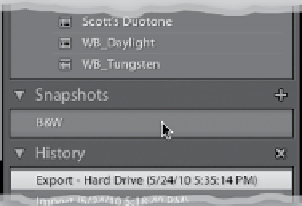
to get around this: (1) As soon as you con-
vert to black and white, press
Command-
N (PC: Ctrl-N)
to save the conversion as a
snapshot. Now you can get back to your
B&W original anytime by clicking on that
snapshot in the Snapshots panel. Or,
(2) after you convert to black and white,
press
Command-' (PC: Ctrl-')
to make
a virtual copy, and then do your editing
to the copy. That way you can use \ to
▼
Using the HSL/Color/B&W
Panel? Color Correct Your
Photo First
If you're going to be using the B&W panel
to make your B&W conversion, before you
go there, start by making the color image
look right first (balance the exposure,
blacks, contrast, etc., first, then you'll get
better results from the B&W panel).