Graphics Programs Reference
In-Depth Information
Step Five:
Once you're done tweaking the HDR
controls, and the image looks pretty
good to you (it doesn't have to look
finished yet, because you'll actually do
the finishing touches in Lightroom), click
OK to close the dialog, and just save and
close the image. Don't rename it, and don't
choose Save As—just press
Command-S
(PC: Ctrl-S)
to Save, then
Command-W
(PC: Ctrl-W)
to Close the image, and the
single HDR image will be sent back to
Lightroom, where it will appear right
next to the originals (as seen here).
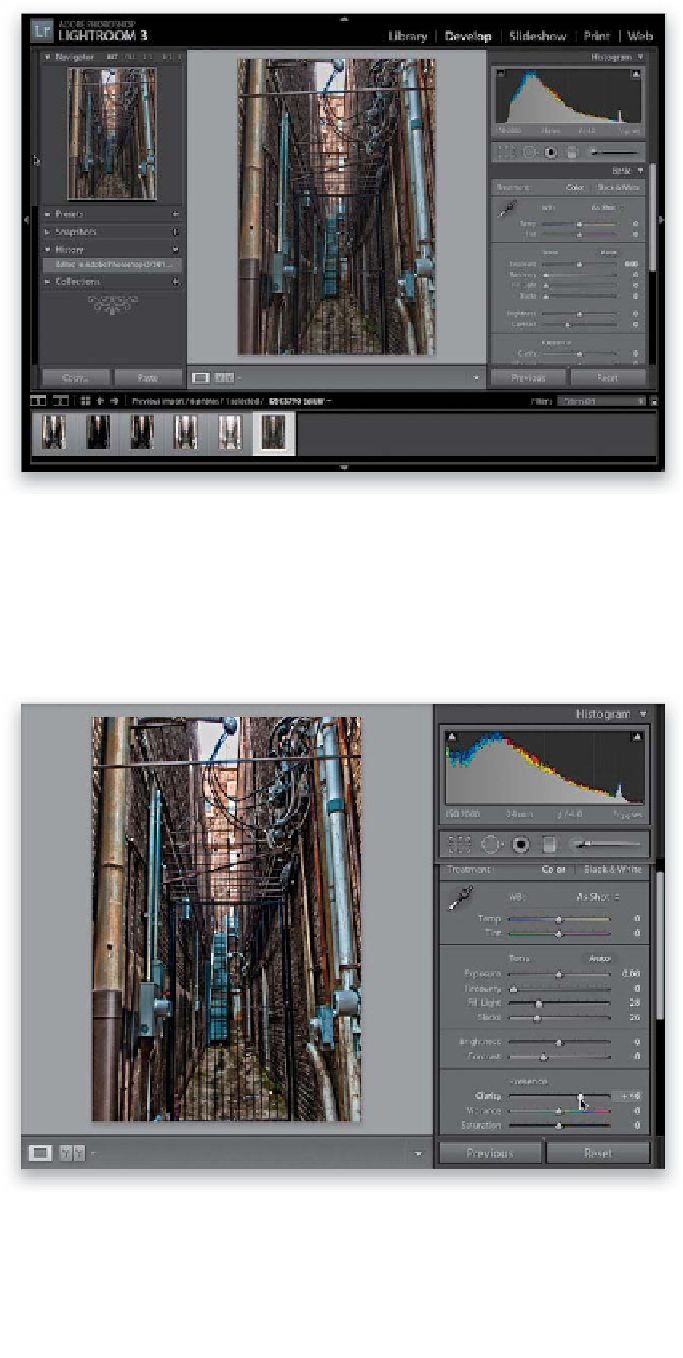
Step Six:
In the Develop module, increase the
Fill Light amount quite a bit (until it
looks a bit washed out), then increase
the Blacks amount quite a bit until it
kind of balances out again (the Fill Light
kind of has a look all its own when you
push it way over to the right, like we did
here). Now, increase the Clarity amount
to +46 (as shown here), which really
brings out the detail and helps add to
the HDR look of the image. If things look
too colorful at this point (which is mighty
likely), then lower the Vibrance amount.
Continued