Graphics Programs Reference
In-Depth Information
When you take a photo from Lightroom over to Photoshop for editing, by default,
Lightroom makes a copy of the file (in TIFF format), embeds it with the ProPhoto
RGB color profile, sets the bit depth to 16 bits, and sets the resolution to 240 ppi.
But if you want something different, you can choose how you'd like your files sent
over to Photoshop—you can choose to send them as PSDs or TIFFs, and you can
choose their bit depth (8 or 16 bits) and which color profile you want embedded
when your image leaves Lightroom.
Step One:
Press
Command-, (comma; PC: Ctrl-,)
to bring up Lightroom's preferences, and
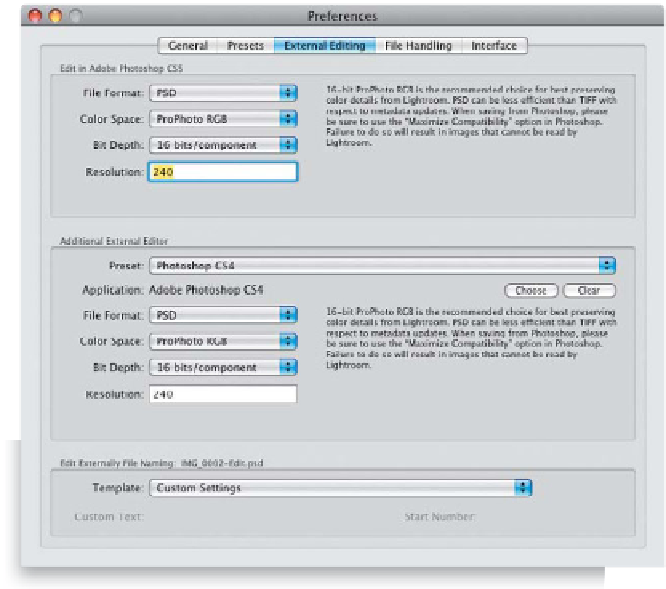
then click on the External Editing tab up
top (as seen here). If you have Photoshop
on your computer, it chooses it as your
default External Editor, so in the top sec-
tion, choose the file format you want for
photos that get sent over to Photoshop
(I set mine to PSD, because the files are
much smaller than TIFFs), then from the
Color Space pop-up menu, choose your
file's color space (Adobe recommends Pro-
Photo RGB, and if you keep it at that, I'd
change your Photoshop color space to
ProPhoto RGB, as well—whatever you do
choose, just use the same color space in
Photoshop so they're consistent). Adobe
also recommends choosing a 16-bit depth
for the best results (although, I personally
use an 8-bit depth most of the time). You
also get to choose the resolution (I leave
mine set at the default of 240 ppi). If you
want to use a second program to edit
your photos, you can choose that in the
Additional External Editor section.
Step Two:
Lastly, you can choose the name applied
to photos sent from Lightroom over to
Photoshop. You choose this from the Edit
Externally File Naming section at the bottom
of the Preferences dialog, and you have
pretty much the same naming choices as
you do in the regular Import window.