Graphics Programs Reference
In-Depth Information
Step Three:
When you drag that tool, it shrinks and
rotates the cropping border to the exact
angle you'd need to straighten the photo
(without leaving any white gaps in the
corners). The exact angle of your correc-
tion is displayed in the Crop & Straighten
options panel next to the Angle slider.
Now all you have to do is press
R
to lock
in your straightening. If you decide you
don't like your first attempt at straight-
ening, just click the Reset button at the
bottom of the options panel, and it resets
the photo to its unstraightened and
uncropped state. So, to try again, grab
the Straighten tool and start dragging.
Step Four:
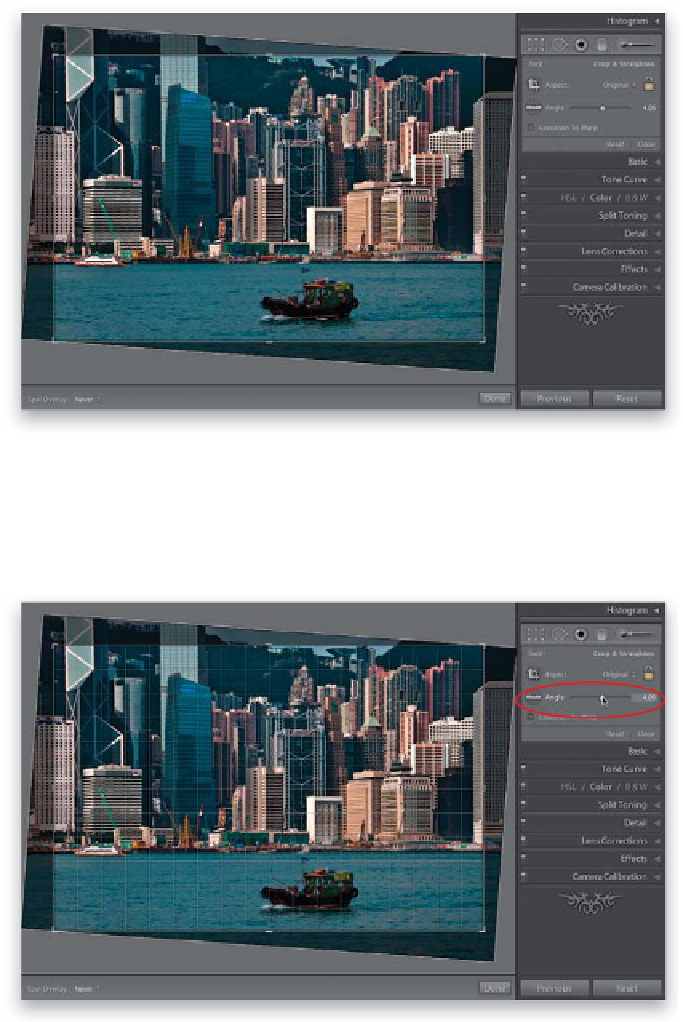
To try the two other methods, we need
to undo what we just did, so click the
Reset button at the bottom of the right
side Panels area, then click on the Crop
Overlay button again (if you locked in
your crop after the last step). The first of
the two methods is to just drag the Angle
slider (shown circled here in red)—drag-
ging it to the right rotates the image clock-
wise; dragging left, counterclockwise. As
soon as you start to drag, a rotation grid
appears to help you line things up (seen
here). Unfortunately, the slider moves in
pretty large increments, making it hard
to get just the right amount of rotation,
but you can make smaller, more precise
rotations by clicking-and-dragging left or
right directly over the Angle amount field
(on the far right of the slider). The second
method is to just move your cursor out-
side the Crop Overlay border (onto the
gray background), and your cursor changes
into a two-sided arrow. Now, just click-
and-drag up/down to rotate your image
until it looks straight.


