Graphics Programs Reference
In-Depth Information
Straightening
If you've got a crooked photo, Lightroom's got three great ways to straighten it.
One of them is pretty precise, and with the other two you're pretty much just
“eyeing it,” but with some photos that's the best you can do.
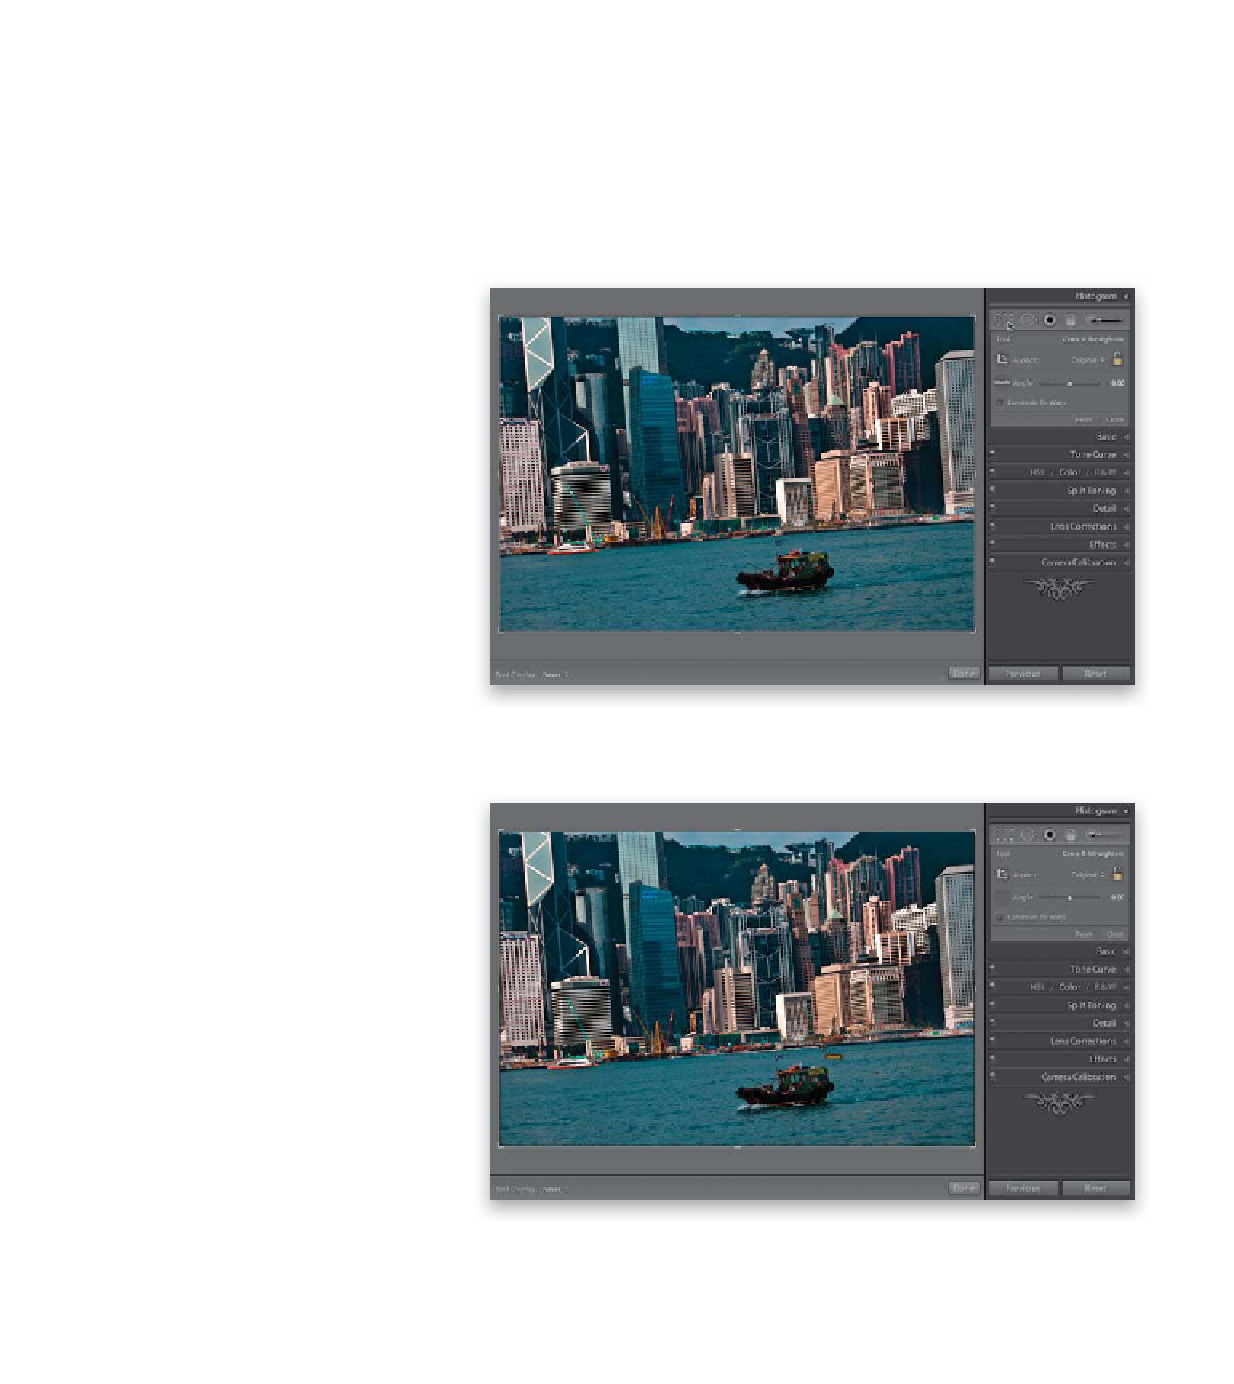
Step One:
The photo shown here has a crooked
horizon line, which is pretty much instant
death for a landscape shot. To straighten
the photo, start by clicking on the Crop
Overlay button, found in the toolbox,
right under the histogram in the Develop
module's right side Panels area (as shown
here). This brings up the Crop Overlay grid
around your photo, and while this grid
might be helpful when you're cropping to
recompose your image, it's really distracting
when you're trying to straighten one,
so I press
Command-Shift-H (PC: Ctrl-
Shift-H)
to hide that grid.
Step Two:
As I mentioned above, there are three dif-
ferent ways to straighten your photo and
we'll start with my favorite, which uses the
Straighten tool. I think it's the fastest and
most accurate way to straighten photos.
Click on the Straighten tool, found in the
Crop & Straighten options panel (it looks
like a level), then click-and-drag it left to
right along something that's supposed to
be level in the image (as shown here, where
I've dragged it along the edge of the water).
See why I like straightening like this? How-
ever, there is one catch: you have to have
something in the photo that's supposed
to be level—like a horizon, or a wall, or a
window frame, etc.