Graphics Programs Reference
In-Depth Information
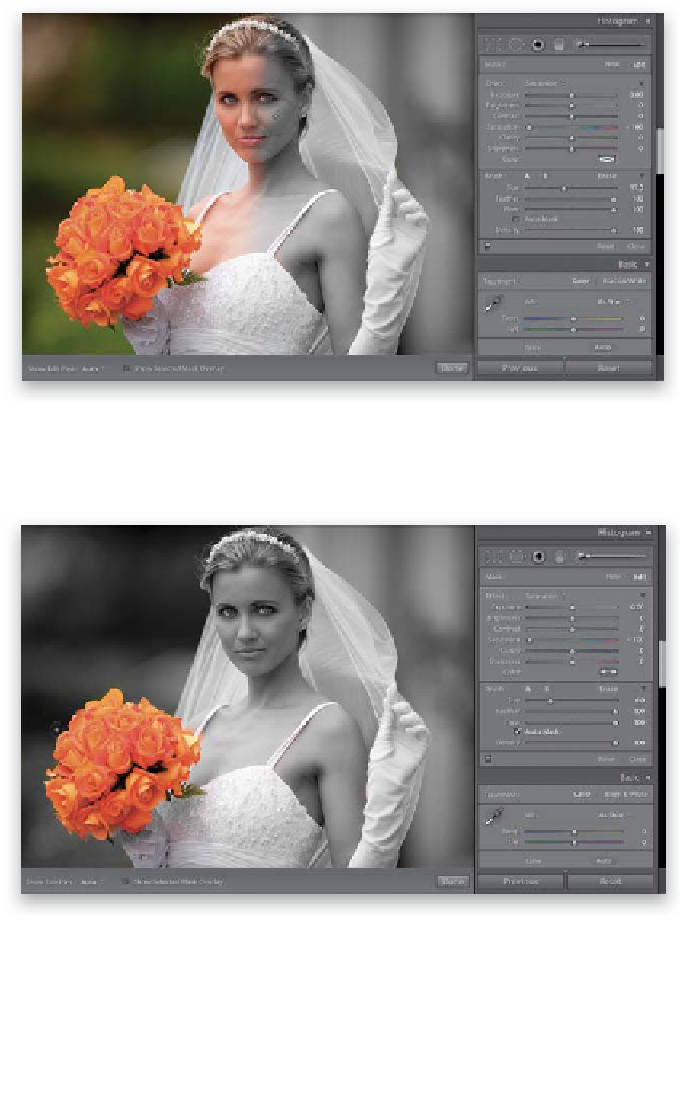
Now that we know how the Adjustment Brush works, we can use it for more
than just dodging and burning—we can use it for creative effects. We'll start
with a technique that is very popular in wedding photo albums, and that is
the classic “bride's in black and white, but her bouquet stays in color” effect
(which, as lame as it may sound, clients absolutely love).
Step One:
In the Develop module, start by clicking
on the Adjustment Brush in the toolbox
near the top of the right side Panels area,
then from the Effect pop-up menu, choose
Saturation
, set the Saturation slider to -100
(as shown here), and begin painting over the
areas you want to be black and white (here,
we're painting over everything but the bou-
quet). This is one instance (painting over a
large background area with different colors)
where I recommend turning the Auto Mask
checkbox off (at the bottom of the Brush
section). Otherwise, it will try to keep you
from painting outside the original area you
clicked in—it will let you paint over other
areas, but it will fight you along the way.
Step Two:
When you get close to the bouquet, that's
when I'd do two things: (1) lower the size
of your brush (you can use the Size slider
in the Brush section or the
Bracket keys
on your keyboard), and (2) turn the Auto
Mask checkbox back on. That way, it will
try to keep your brush from painting on
the flowers, because their color will be
much different than the white dress color
and fleshtone colors you'll be painting over.
The final effect is shown here.