Graphics Programs Reference
In-Depth Information
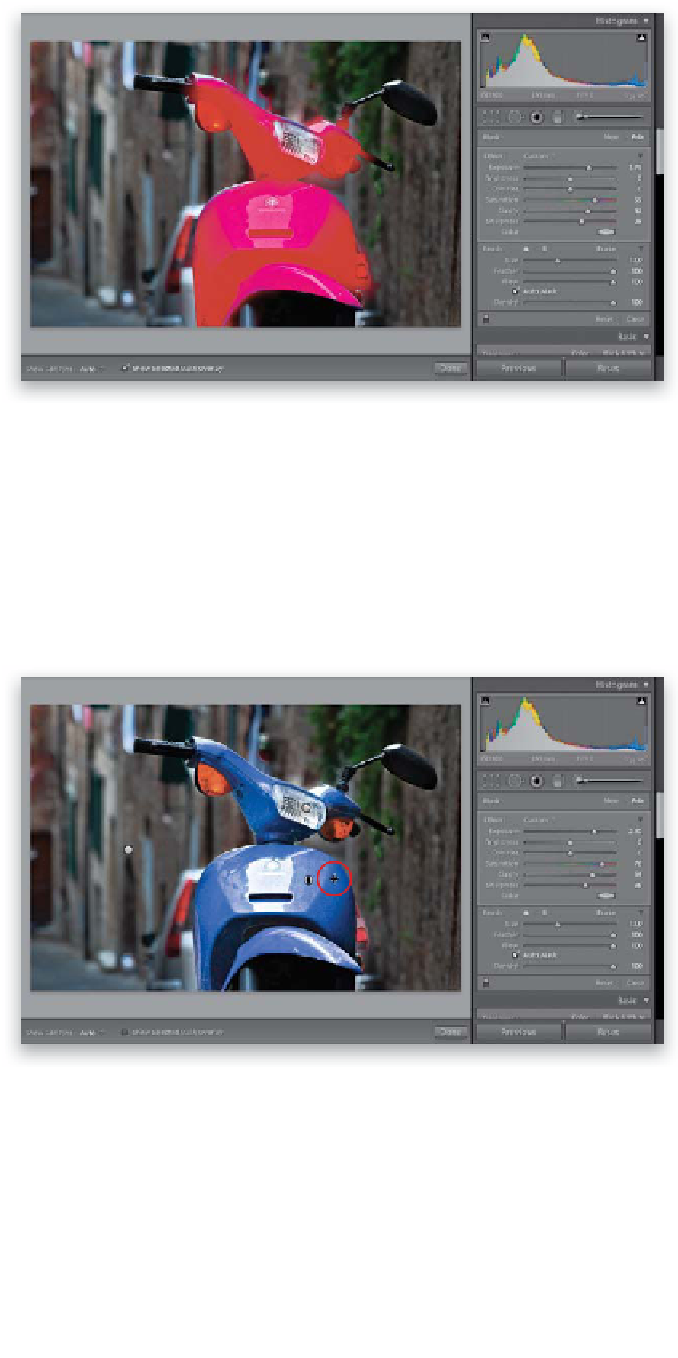
Step 11:
So, how do you know if you've really
painted over an entire area? How do
you know whether you've missed a spot?
Down in the toolbar, across the bottom
of the Preview area, you'll find a checkbox
for Show Selected Mask Overlay. Turn that
on and it shows a red mask over the area
you painted (as seen here). This is incred-
ibly handy for making sure you didn't miss
any areas. If you did miss an area, just paint
over it. If you painted outside of where
you wanted, press-and-hold the Option
(PC: Alt) key and paint over that area to
remove it (the red mask will go away where
you painted). When you're done editing
your mask, turn the Show Selected Mask
Overlay checkbox off. If you just want a
quick look at the mask, as a shortcut you
can move your cursor directly over a pin
and it shows you the red mask overlay for
exactly where you painted.
Step 12:
Another nice feature of the Adjustment
Brush is that you can make onscreen inter-
active adjustments, kind of like you do with
the Targeted Adjustment tool (which you
learned about in Chapter 4). So, to adjust
the Exposure amount for the scooter, just
move your cursor directly over the Edit Pin
on the scooter, and your cursor changes to
a bar with two arrows—one pointing left
and one pointing right (shown circled here
in red). Those are letting you know that
you can now click-and-drag left or right to
make changes (try it—click-and-drag to the
right to increase all the effects you applied
to that Edit Pin).
Continued