Graphics Programs Reference
In-Depth Information
Everything we've done in the Develop module so far affected the entire image. For
example, if you drag the Temperature slider, it changes the white balance for the
entire image (Adobe calls this a "global adjustment"). But what if you want to adjust
one particular area (a "local" adjustment)? You'd use the Adjustment Brush, which
lets you paint changes just where you want them, so you can do things like dodging
and burning (lightening and darkening different parts of your photo), but Adobe
added more to this than just lightening and darkening. Here's how it works:
Step One:
In the Develop module, in the toolbox
right above the Basic panel, click on the
Adjustment Brush icon (shown circled
here), or just press the letter
K
on your
keyboard. An options panel will pop
down below the toolbox with all the
controls for using the Adjustment Brush
(as seen here).
Step Two:
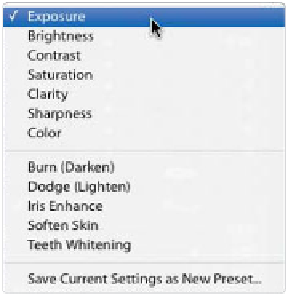
With the Adjustment Brush, you start by
choosing which effect you want to paint
with from the Effect pop-up menu (shown
here). In our example, we basically want
to re-light the photo, making some areas
brighter (the scooter), and other areas
darker (the background). We'll also make
some areas more colorful and others sharper.
We'll start with making the scooter brighter,
so choose
Exposure
from the pop-up menu
(if it's not already selected).


