Graphics Programs Reference
In-Depth Information
Lightroom Killer Tips
> >
shadows too black, or the highlights too
bright), go ahead and get the settings
the way you want them in Lightroom,
then press-and-hold the Option (PC: Alt)
key and the Reset button at the bottom
of the right side Panels area changes into
a Set Default button. Click on it and it
brings up a dialog showing you the file
format or the camera make and model
of the current image. When you click
Update to Current Settings, from now
on, your current settings will be your
new starting place for all images taken
with that camera, or in that file format.
To return to Adob e's de f ault s e t tings for
that camera, go back to that same dialog,
but this time click on the Restore Adobe
Default Settings button.
▼ Updating Your Presets
If you start your editing by using
a Develop module User Preset, and
you like the new changes, you can
available to you is Auto. However, here's
a cool workaround to get you more
choices: Open a RAW image and only
make one edit—choose the White
Balance preset Daylight. Now, save just
that change as a preset and name it
White Balance Daylight. Then do that
for each of the White Balance presets,
and save them as presets. When you
now open a JPEG or TIFF image, you'll
have these one-click White Balance pre-
sets you can use to get a similar look.
update your preset by Right-clicking
on the old preset and choosing
Update
with Current Settings
from the pop-
up menu.
▼
Get Different Versions of Photos
Without Making Virtual Copies
▼
Fix Underexposed Photos
Fast with Match Exposure
If you see a series of photos of the
same subject, and some of these
photos are underexposed, try this
quick trick to fix those fast: Click on a
properly exposed photo from that
series, then while it's selected, also
select the underexposed photos,
then go under the Settings menu and
choose
Match Total Exposures
. It will
evaluate the overall exposure from your
“most-selected” photo (your properly
exposed photo) and use that to fix the
underexposed photos.
▼ One of My Most-Used Presets
The intentional vignette look is really
hot right now, and it's an ideal effect
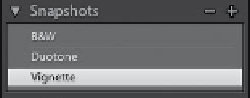
I briefly mentioned snapshots earlier
in this chapter, but I want to give you
another way to think of them. Think of
them as another way to have one-click
access to multiple versions of your photo.
When you're working in the Develop
module and see a version of your photo
you like, just press
Command-N (PC:
Ctrl-N)
and how your photo looks at that
moment is saved to your Snapshots panel
(you just have to give it a name). So, that
way, you could have a B&W version as a
snapshot, one version as a duotone, one
version in color, one with an effect, and
see any of those in one click, without hav-
ing to scroll through the History panel to
try to figure out where each look is.
to save as a one-click preset. Just go to
the Lens Corrections panel, click on
Manual at the top, click-and-drag the
Lens Vignetting Amount slider all the
way to the left (to -100), then click-
and-drag the Midpoint slider to the
left to 10, and then go to the Presets
panel and save that as a vignette
preset. Now you can just move your
cursor over this preset and you'll get
an instant preview of how your image
would look with a vignette applied
up in the Navigator panel at the top
of the left side Panels area.
▼
Create White Balance Presets
for JPEG and TIFF Images
I mentioned earlier that with JPEG or TIFF
images the only White Balance preset