Graphics Programs Reference
In-Depth Information
Lightroom Killer Tips
> >
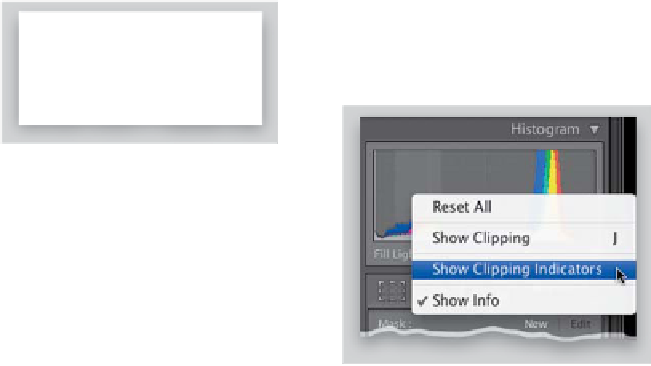
then just Right-click anywhere on the
histogram itself and choose
Show Clip-
ping Indicators
from the pop-up menu
to turn it off, and they'll be tucked out
of sight. If you want them back, go back
Lightroom, you'll have the RAW and
JPEG photos side-by-side, making it
easier to pick the profiles for your
RAW photo that matches the JPEG
your camera produces.
▼
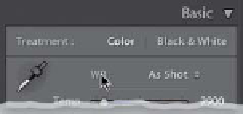
Resetting the White Balance
▼ Choosing What Will Be
Yo u r B e fo re a n d Af te r
By default, if you press the
\ (backslash)
key
in the Develop module, it toggles
you back and forth between the original
untouched image (the Before view) and
the photo as it looks now with your edits.
However, what if you don't want your
Before photo to be the original? For
example, let's say you did some Basic
panel edits on a portrait, and then you
used the Adjustment Brush to do some
To reset both the Temperature and T Tint
White Balance sliders to their original
As Shot settings, just double-click directly
on the letters WB in the Basic panel.
▼
Panel Trick for
Impatient People
Have you noticed that when you expand
or collapse a panel, it gently (and argu-
ably slowly) animates this sequence (in
other words, they don't snap open—they
“glide” open). If you'd like to skip the fancy
gliding and have those panels snap open/
closed the moment you click on them,
just
Command-click (PC: Ctrl-click)
on them instead.
to that same pop-up menu, and choose
Show Clipping Indicators again.
▼
Copy What You Last Copied
When you click the Copy button in
the Develop module (at the bottom
of the left side Panels area), it brings
up a Copy Settings dialog asking which
edits you want to copy. However, if you
know you want to copy the same edits as
you had previously (maybe you always
copy everything), then you can skip
having that Copy Settings dialog pop-up
up completely by pressing-and-holding
the Option (PC: Alt) key, then clicking the
Copy button (it will change from Copy…
to Copy).
▼
Picking Zooms in
the Detail Panel
portrait retouching. Maybe you'd like to
see the Before photo showing the Basic
panel edits after they were applied, but
before you started retouching. To do that,
go to the History panel (in the left side
Panels area), and scroll down until you find
the step right before you started using the
Adjustment Brush. Right-click on that his-
tory state and choose
Copy History Step
Settings to Before
. That now becomes
your new Before photo when you press
the \ key. I know—that's totally cool.
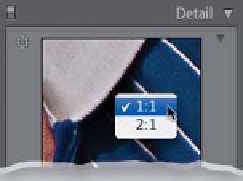
If you Right-click inside the little preview
window in the Detail panel, a little
pop-up menu will appear where you
can choose between two zoom ratios
for the preview—1:1 or 2:1—which kick
in when you click your cursor inside the
Preview area.
▼
Making Your Current Settings the
New Defaults for That Camera
When you open a photo, Lightroom
applies a default set of corrections based
on the photo's file format and the make
and model of the camera used to take the
shot (it reads this from the built-in EXIF
data). If you want to use your own custom
settings (maybe you think it makes the
▼
Make it Easier to Choose
Camera Profiles
To make thing s ea sier when choos-
ing your Camera Calibration panel
profiles, try this: Set your DSLR to
shoot RAW+JPEG Fine, so when you
press the shutter button it takes two
photos—one in RAW and one in
JPEG. When you import these into
▼
Hiding the Clipping
Warning Triangles
If you don't use the two little clipping
warning triangles in the top corners
of the histogram (or you want them
turned off when you're not using them),