Graphics Programs Reference
In-Depth Information
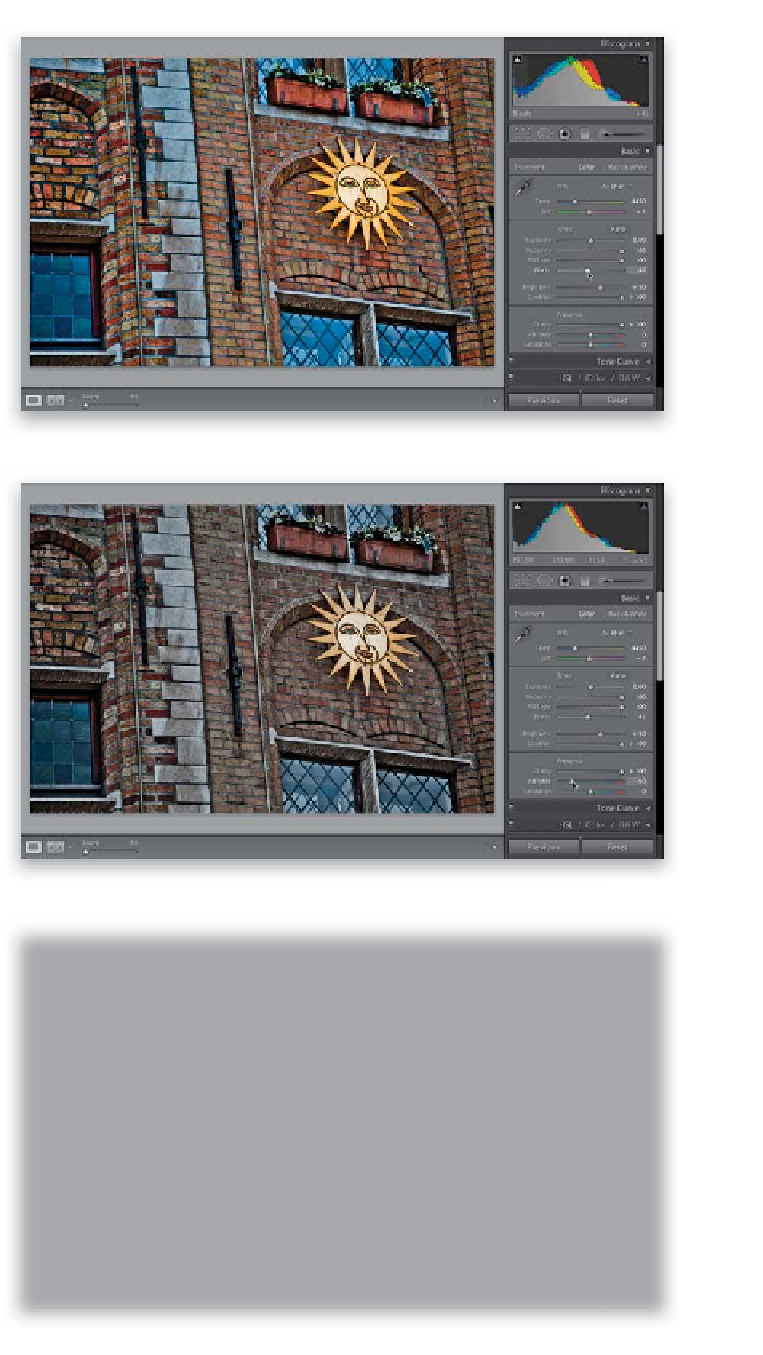
Step Three:
Dragging the Fill Light slider all the way to
the right will usually make the image way
too bright in the shadow areas, so you'll
need to drag the Blacks slider quite a bit
to the right until the image looks fairly bal-
anced again. This brings back the shadows
and the color saturation to the shadow
areas. The problem is that saturation in the
shadows usually makes the image look to
colorful and punchy, which isn't the worst
thing in the world (in fact, it looks like a
fake HDR at this point), but the key to this
look is an overall desaturated feel (if that
makes any sense).
Step Four:
So, you do that by going to the Vibrance
slider and dragging it quite a bit to the left
(as shown here. If this was a portrait, you'd
drag it left until there's just a little color
left in the portrait). You can see how doing
these two steps brings out incredible
details in everything from the bricks
to the planters.
Step Five:
The final step is to add an edge vignette
to darken the edges of your photo, and
put the focus on your subject. So, go to
the Lens Corrections panel (in the right
side Panels area), click on Manual at the top,
and drag the Lens Vignetting Amount slider
nearly all the way to the left (making the
edges really dark). Then drag the Midpoint
slider pretty far to the left, as well, but not
quite as far as the Amount slider (the Mid-
point slider controls how far the darkened
edges extend in toward the middle of your
photo. The farther you drag this slider to
the left, the farther in they go). At this
point, you could save this as a preset, but
just understand that because each photo
is different, the preset is just a starting
place—you'll always have to dial in the
right amount of desaturation yourself
using the Vibrance slider.