Image Processing Reference
In-Depth Information
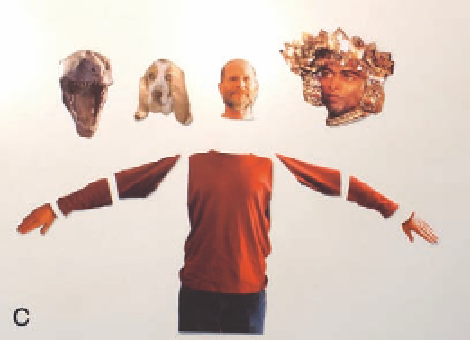
ExErcisE Fig 5.c
A series of
heads that go on your cutout
self-portrait.
If these images are printed on thin paper, they will require some backing. I
recommend getting some spray glue and attaching these magazine heads to
some of the thin card stock you used for printing your self-portrait. The image
can be loosely cut out of a magazine and attached to the card. Once they are
bonded then you can do the careful cutting with the X-Acto knife required to
pull the head image from the background.
Now that you have all of your cutout elements, you are ready to set up the
camera and shooting area. If you have a downshooter available or created
a setup with a suspended piece of glass and a lower level background, then
place a bright green (ideally a chroma key green) card on that lower level.
This way, when you shoot your animation, you can put in any background
you desire later in postproduction. Please refer to Chapter 10 regarding this
technique. I want to make sure that this exercise can be simply executed, so I
continue as though you have no downshooter available. You can shoot these
cutouts on a stable, simple, plain tabletop that allows the cutouts to stand
out visually. You also need some beeswax, Blu-tack, or thin double-sided tape
(this has the sticky material on both sides of the tape). I recommend using
the sticky wax often found at miniature and craft stores for holding small
objects on shelves. Use this wax to stabilize your cutout parts as you move
them on the tabletop. Assemble your portrait of yourself together with the
cutout parts on the tabletop. Then, take your dslr camera mounted on your
tripod and raise the tripod pretty high up so you can tilt the head and camera
down at the cutout on the table. It is ideal to have the angle of the camera
perpendicular to the tabletop, but this is not always possible. One way to
allow this to happen is if you can slightly tilt the table up toward the camera.
Another technique that you can use is to shoot on a clean floor space with the
tripod directly above the cutout shooting area. It is important to note that
you probably have to change the focal length of the lens to something longer,
like a 55 mm or even 85 mm. If you are shooting on the floor and using a zoom
lens, then adjust the focal length so you do not see the legs of the tripod
but only the cutout model with some room around it. It would be smart to
adjust your iris to f-8 or smaller (i.e., f-16) to help maintain a good depth of


Search WWH ::

Custom Search