Database Reference
In-Depth Information
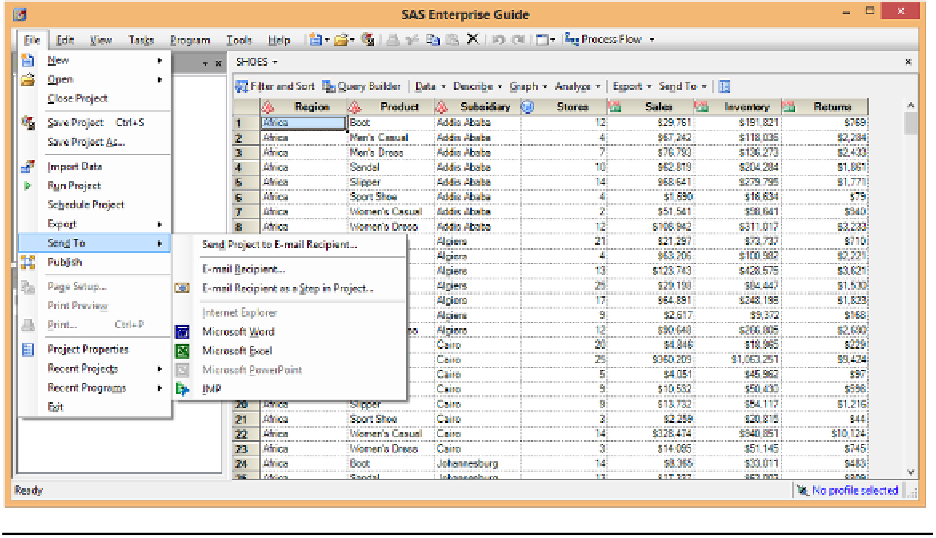
Example 5.2 Using the “Send To” Method
This example has the following steps. Note that the “Send To” option button is in three locations.
1.
Select a file to output. Any SAS dataset will do. See Example 5.1.
2.
Select the “Send To” option on the File tab.
3.
Select the “Microsoft Excel” option displayed on the pop-up menu.
4.
Press the Microsoft Excel button to send the input SAS file directly to Microsoft Excel and to save
the workbook using Excel save options. This option opens the Microsoft Excel version installed
on your computer and allows you to save the output in any Excel format you have available
including Excel 2007, 2010, and 2013. Be aware that this method of sending data to Excel may
directly open Excel with the data displayed.
Figure 5.3: SAS Enterprise Guide “SEND TO” Menus.
Example 5.3 Using the “Send To” Method to Output a Graph or Report
This section assumes that you have generated a graph or report using SAS Enterprise Guide 4.3 or later.
SAS Add-In for Microsoft Office is required for this example of how to send data to Excel, Word, or Power
Point.
SAS Enterprise Guide 4.3 or later can send graphs and reports to Microsoft programs like Word, Excel, and
Power Point. This example will focus on Excel. Figure 5.4a is an example of a graph created with the bar
graph wizard. Note that the Enterprise Guide project tree also shows that a report has been generated. This
report simply includes a title and a footnote. Yours will be much nicer.

Search WWH ::

Custom Search