Database Reference
In-Depth Information
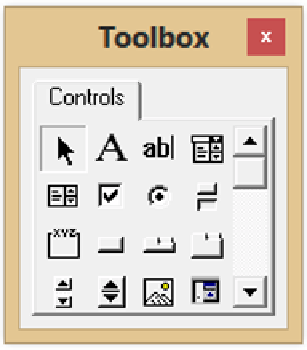
In the Toolbox pop-up window, there are 16 pictures of control items. Here, for simplicity, we can identify
them in a 4-by-4 grid that is the same as the layout of the pop-up menu. (See Figure 14.6a below.) To
install an object onto the UserForm1 object, click on one of the toolbox items, and then move the cursor to
the UserForm. Hold the left mouse button down, and drag the mouse until the object is the size that you
want it to appear. The IDE allows you to position and size items on the UserForm with a great deal of ease.
If the item is not exactly how you want it, then highlight it and press Delete.
Figure 14.5: The Excel UserForm Toolbox.
Figure 14.6a: An Explanation of the Icons on the Excel Toolbox Shown in Figure 14.5.
IDE Controls on the Toolbox Pop-up Menu
Menu option to select a
control item
Label
TextBox
ComboBox
ListBox
CheckBox
OptionButton
ToggleButton
Frame
CommandButton
TabStrip
MultiPage
ScrollBar
SpinButton
Image
RefEdit
14.3.4 Building a Sample Integrated Development Environment (IDE) Menu
Our little tool will be using only a few of these controls to make the GUI work. We will use the Label,
TextBox, ComboBox, CommandButton, and the CheckBox controls. The next screen has one of each
control item on the UserForm1 work area. When you click on the blank UserForm1 work area, it becomes
the active component and you can click on the corner and expand the form. Controls are added to the
UserForm1 workspace by clicking on the Tool icon in the toolbox, right-clicking on an anchor spot in the
UserForm1 space, and enlarging the control before releasing the right mouse button. Oh yes--and the
Toolbox menu floats around the screen, so you can put it anywhere.


Search WWH ::

Custom Search