Database Reference
In-Depth Information
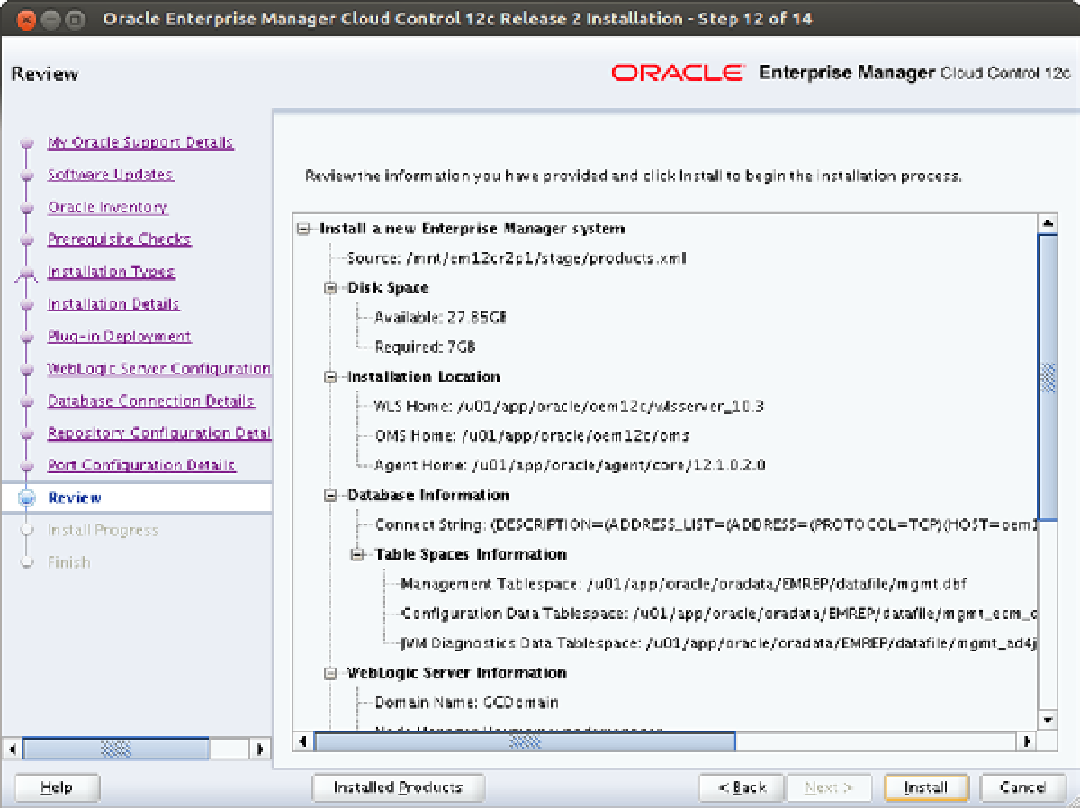
Figure 8-13.
Summary screen
The summary screen as shown in Figure
8-13
gives you the option to review the choices made. It is the last
opportunity to go back and make any changes. If you are happy with the settings click on “Install” to begin the
installation and configuration of Enterprise Manager Cloud Control. You can now change your focus to another task
since the process is almost certainly going to take a while, even on fast hardware.
You will have to wait for the installation and configuration steps to finish before you can run the root scripts.
Eventually the well-known “execute as root” pop-up screen will appear. As usual with Oracle products, open a root
shell on the OMS and execute the root scripts as indicated in the pop-up window. If you do not have root access to the
host, you will need to ask or ring the friendly Linux administrator on duty to perform that task for you.
Close the pop-up windows after the root scripts completed, and wait for the final screen summarizing the port
information and initial access to appear. The information shown in it is important, but thankfully Oracle preserved the
text in the Management Services home directory in the setupinfo.txt file. Nevertheless you should take note of the EM
console URL, which you need for logging in.
Congratulations, you have successfully installed and configured the initial Enterprise Manager 12 Cloud Control
environment! Before you log in for the first time there is one very important step to be performed. The repository is
encrypted with a secret key you should back up immediately:
[oracle@oem12oms1 bin]$ ./emctl exportconfig oms -dir /path/to/safe/location/
Now you are ready to log in for the first time.
Search WWH ::

Custom Search