Database Reference
In-Depth Information
◾
Task 1: Add Worker Role to Process Queue Messages:
he task creates a worker
role.
TASK 1: ADD WORKER ROLE TO PROCESS QUEUE MESSAGES
To process a message, you need to add a worker role project. To do so, follow the following
steps:
1. Assume that the StudentClub project is still open. Open the
Default.aspx.cs
ile
and make sure that the code sections
//Declare a CloudQueueClient
type of object
and
//queue a message
are added as shown in Task 4
of Activity 11.1.
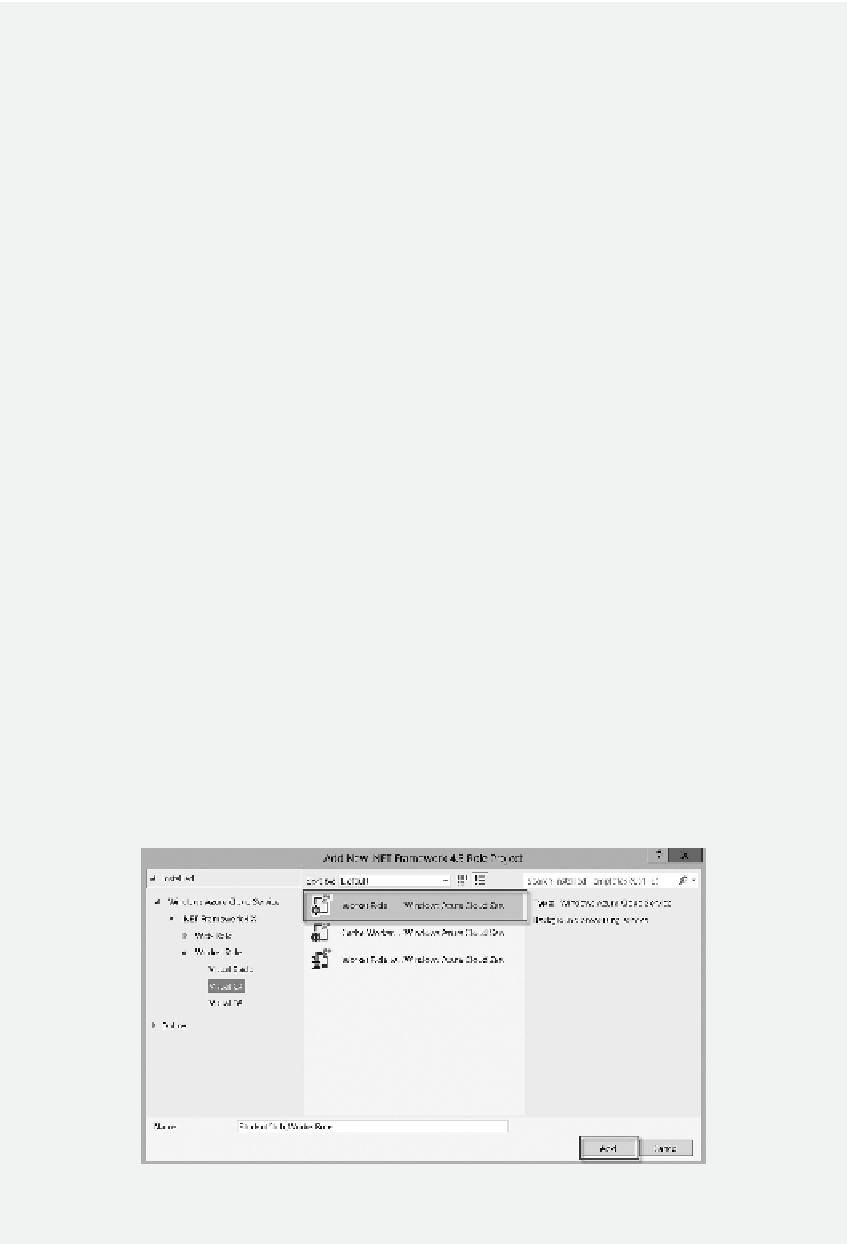
2. In
Solution Explorer
, right click the
Roles
node under the StudentClub project, select
Add
and then
New Worker Role Project
. In the Add New Role Project dialog, select
the
Worker Role
category and name the
Worker Role
template as
StudentClub_
WorkerRole
as shown in Figure 11.21, and then click
Add
.
3. To add a reference to StudentClub_Info, right click the
StudentClub_WorkerRole
project and select
Add Reference
. Click the
Projects
tab, select
StudentClub_Info
and then click
OK
as shown in Figure 11.22.
4. To specify the connection string, double click the role
StudentClub_WorkerRole
in the Solution Explorer pane and click
Properties
. After the Properties dialog is
opened, click the
Settings
link. Click the
Add Setting
tab. In the
Name
column,
enter
DataConnectionString
, and specify the Type as
Connection String
. Click the
ellipsis button labeled with the icon
[...]
as shown in Figure 11.23.
5. After the
Storage Account Connection String
dialog is opened, select the option
Windows Azure storage emulator
to use the local Windows Azure storage emulator
and then click
OK
.
6. Double click the
WorkerRole.cs
ile of the StudentClub_WorkerRole project and
insert the following namespace declaration:
Figure 11.21
Create worker role.