Database Reference
In-Depth Information
Figure 3.26
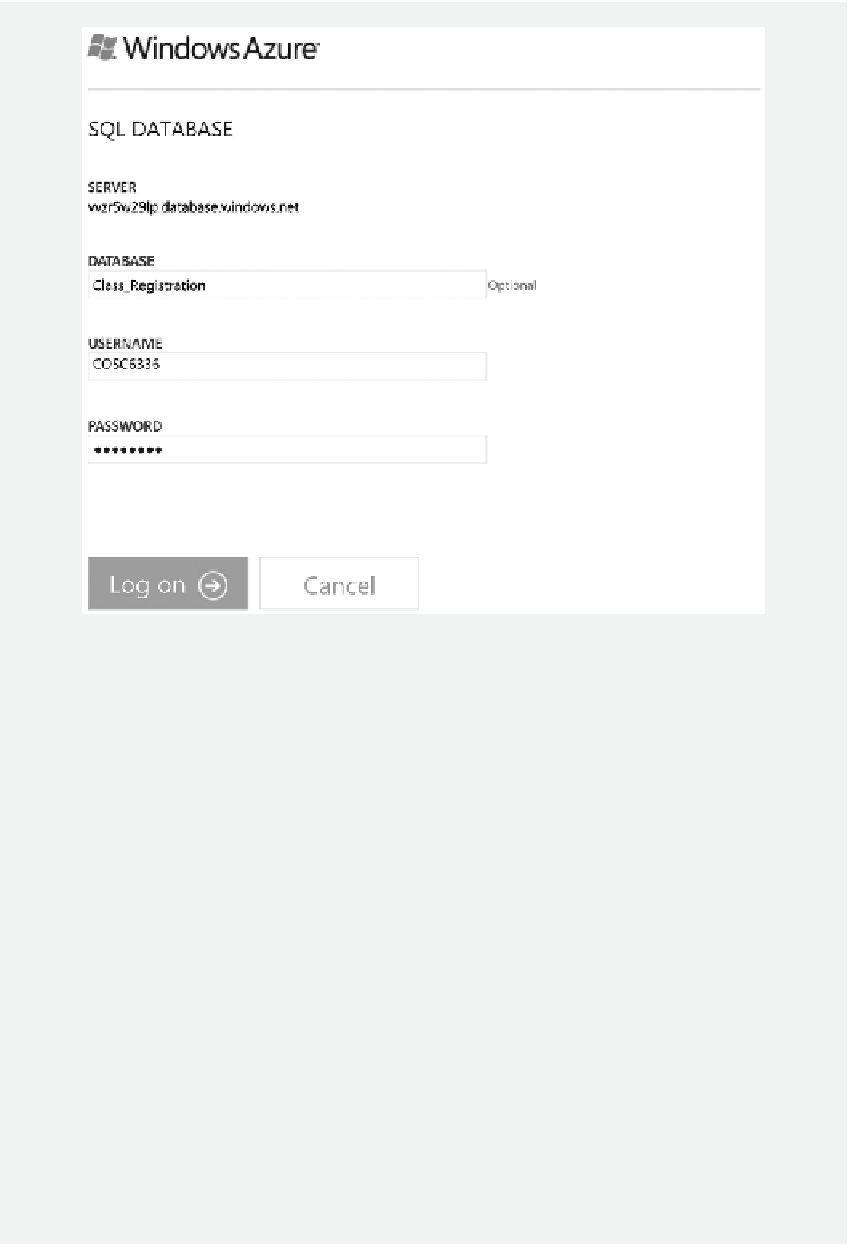
Remotely log on to Windows Azure SQL Database.
2. You will be prompted to enter the authentication information for the remote login
through the
SQL Database
portal.
Enter your server administrator's user name
and password created in the previous chapter, and then click
Log on
as shown in
Figure 3.26.
3. If the login is successful, you should see the administration page. Click the
Design
icon on the left-hand side of your screen. Click the
New table
link. You will be
prompted to design a new table. For example, the BUILDING table can be designed
as shown in Figure 3.27. After the coniguration is done, click the
Save
icon.
4. Similarly, you can create other tables without foreign keys, such as COURSE,
FACULTY, DAYS, SEMESTER, and TIMEBLOCK as shown in Figures 3.28
through 3.32.
5. After the tables without foreign keys are created, you can create other tables with for-
eign keys. To do so, click
Tables
on the top of your screen and click
New table
. hen,
follow the screenshots shown in Figures 3.33 through 3.39 to create these tables.
Now, your database is ready to be populated with data. You can enter data manually
through GUI (graphical user interface).