Hardware Reference
In-Depth Information
3. Now you are ready to find out the device name of your SD card. To do this,
run the
df
command. The
df
command allows you to find out how much
storage is available for each storage device that is attached to your computer.
We need to run the following command:
df -h
4.
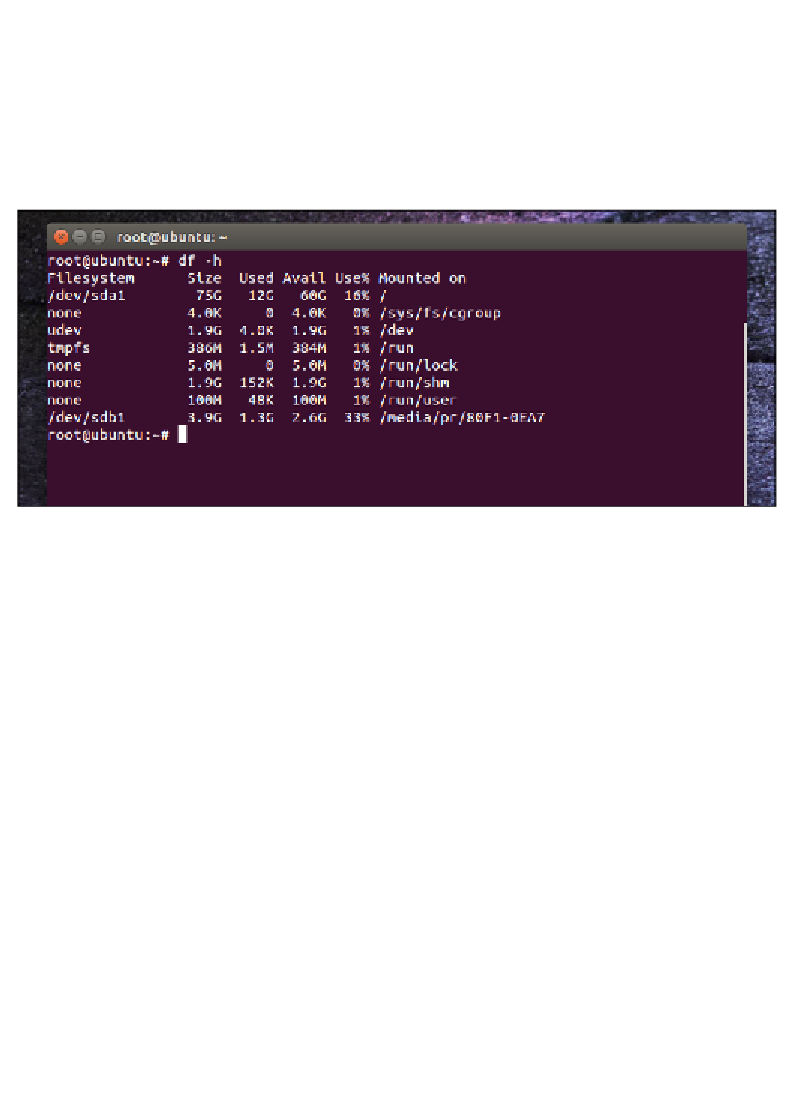
The following screenshot shows the output:
The results obtained by running the
df
-h
command are shown in the preceding
screenshot. We can see that in this case, the SD card we are using is
/dev/sdb1
.
If your machine has a built-in SD card reader, this can be called
/dev/mmcblk0p1
.
Regardless of the device name, we only need the first part of the name. In the
preceding example, we will use
/dev/sdb
, or in the case of
/dev/mmcblk0p1
,
we will use
/dev/mmcblk0
. An easy way to double-check whether you have
chosen the correct device is to check the size.
Now that you have got the name of your device, you need to unmount the SD card.
To do this, we will use the
unmount
command. We do this by running the following
command in your terminal for the device name that we just found:
umount /dev/sdb1
Now we are finally ready to write the image to our SD card. To do this, we need
to change into the directory in which you have downloaded the Raspbian image.
We then run the
dd
application. As mentioned in the previous section, the
dd
utility
is designed to read and write raw data from devices and can be used for anything
from copying hard drives to writing images to SD cards. The following command
runs the
dd
command as a super user:
cd Desktop
dd bs=1m if=2014-06-20-wheezy-raspbian.img of=/dev/sdb1

