Hardware Reference
In-Depth Information
3. Now, you are finally ready to write the Raspbian image to your SD card. To do
this, fire up Terminal. You will find it in the
Utilities
tab under
Applications
.
As OS X is based on the BSD operating system, we have access to all of its utilities. We
are going to use a utility called
Disk
Dump
(
dd
) to actually write the image file to our
SD card. The
dd
utility is designed to read and write raw data from devices and can be
used for anything from copying hard drives to writing images to SD cards.
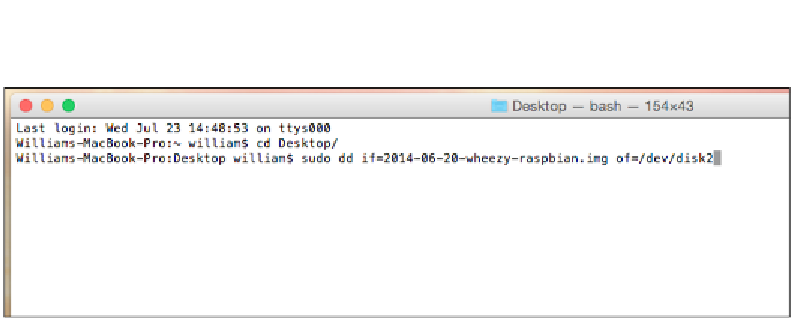
1.
Once you have opened Terminal, you need to change to the directory that
contains the image file. In this case, it is the
Desktop
folder,
cd
Desktop
.
2.
We then run the actual command to write the image to the SD card,
substituting
if=2015-01-31-wheezy-raspbian.img
with the name of your
Raspbian image file, and diskX with the BSD name that you found in the
previous steps:
sudo dd bs=1m if=2015-01-31-wheezy-raspbian.img of=/dev/diskX
This command runs the
dd
command as a super user. The
dd
command
reads the image file
2015-10-31-wheezy-raspbian.img
and writes it to
the SD card. It writes the data in chunks of one megabyte.
3.
You will be asked for your administrator's password when you run this
command. This command will take anywhere up to half an hour to write
the image to your SD card, depending on its speed.
When this is done, insert the card into your Raspberry Pi and you are ready to go.
Writing the image using Linux
The process of writing the Raspbian image that you have just downloaded using
Linux is straightforward. As mentioned, there are many different distributions of
Linux. The steps that follow are tested on Ubuntu, a distribution of Linux that, like
Raspbian, is based on Debian. As mentioned previously, make sure that all your
removable storage devices are unplugged so that they are not accidently erased.