Hardware Reference
In-Depth Information
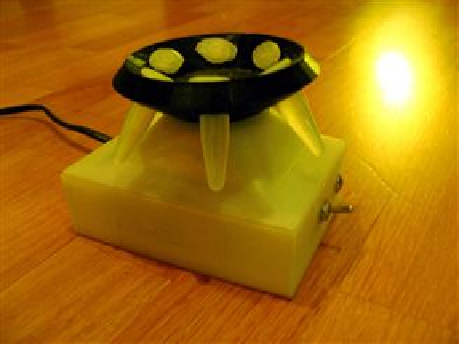
FIGURE 6.73
Table top microcentrifuge.
The BOM includes the following:
1 × Graupner speed 400 motor (or similar sized motor, available on the Internet or your local
model shop)
1 × 220 V switch
1 × 220 V to 6 V trafo (Shown: a small print-trafo 6 V, 3.2 VA, size 35 × 42 × 30 mm)
1 × bridge rectifier1
1 × pot suitable to regulate your motor speed (the size depends on your motor's Ohm)
2 × 3 mm screws (about 5 mm long)
2 × 3 mm threaded rod (about 1 cm long), with a slit sawed into it as an inexpensive replace-
ment for a headless screw
2 × 3 mm nut
An electric cord
Printed parts (printed in PLA, 1.2 mm wall-size, 50% infill for all parts—0.2 mm slicing using
Cura).
Print your parts on a RepRap (built in the last chapter) or similar. Both the rotor and casing
bottom can be printed without support material; however, the casing top does demand sup-
it up to speed inside a steel pot, similar to the protocol for the DremelFuge. Afterwards it can
function as a desktop centrifuge. If you are concerned about safety or your own making skills,
you can build or print a safety shield for it as shown in the next example. The example shown
here can spin up to 16,400 RPM at 7.2 V, but was only run at 6 V. Again, be careful particularly
with the printing as a rotor that is not printed carefully may break during centrifugation and
cause damage or injury.
6.5.2.3 USB powered cytocentrifuge
loped by Thingiverse user siderits (Dr Richard Siderits of Robert Wood Johnson University
Medical School) for under $10. It uses a small DC motor (1.5-6 V, 4000 RPM) and a DC motor
speed controller kit to create the USB powered biocentrifuge shown in
Figure 6.74
. Although
you can use longer rotor arms, the test centrifuge has a radius of 40 mm. The motor will spin
Search WWH ::

Custom Search