Graphics Programs Reference
In-Depth Information
Figure 3.4
The modified floor
4.
Create another floor of the same type and same initial dimensions,
15
′
× 30
′
(4500 mm × 9000 mm), near the first floor (reference
Figure 3.5 for the location). Leave some space between the two floors.
5.
Offset the floor 1
′
-0
″
(300 mm) above Level 1 by entering this value
into Height Offset From Level in the Properties palette.
6.
Finish the sketch to complete the floor (Figure 3.5).
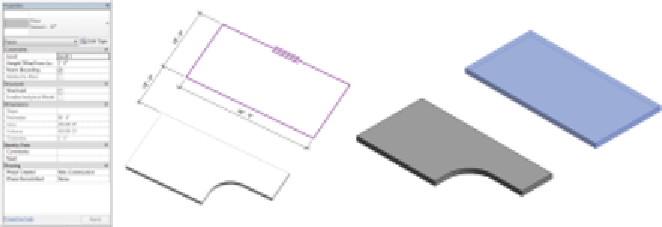
Figure 3.5
New floor 1
′
-0
′′
(300 mm) above Level 1
Not all floors are flat, and Revit Architecture has several tools to create sloped
conditions. In the following exercise you will investigate both options by creating
and modifying sloped floors using two tools: Slope Arrow and Shape Editing.
exercise 3.3: Create Sloped Floors
download the files for Chapter 3, and open the file
c03-ex-3.3start.rvt
.


Search WWH ::

Custom Search