Graphics Programs Reference
In-Depth Information
6.
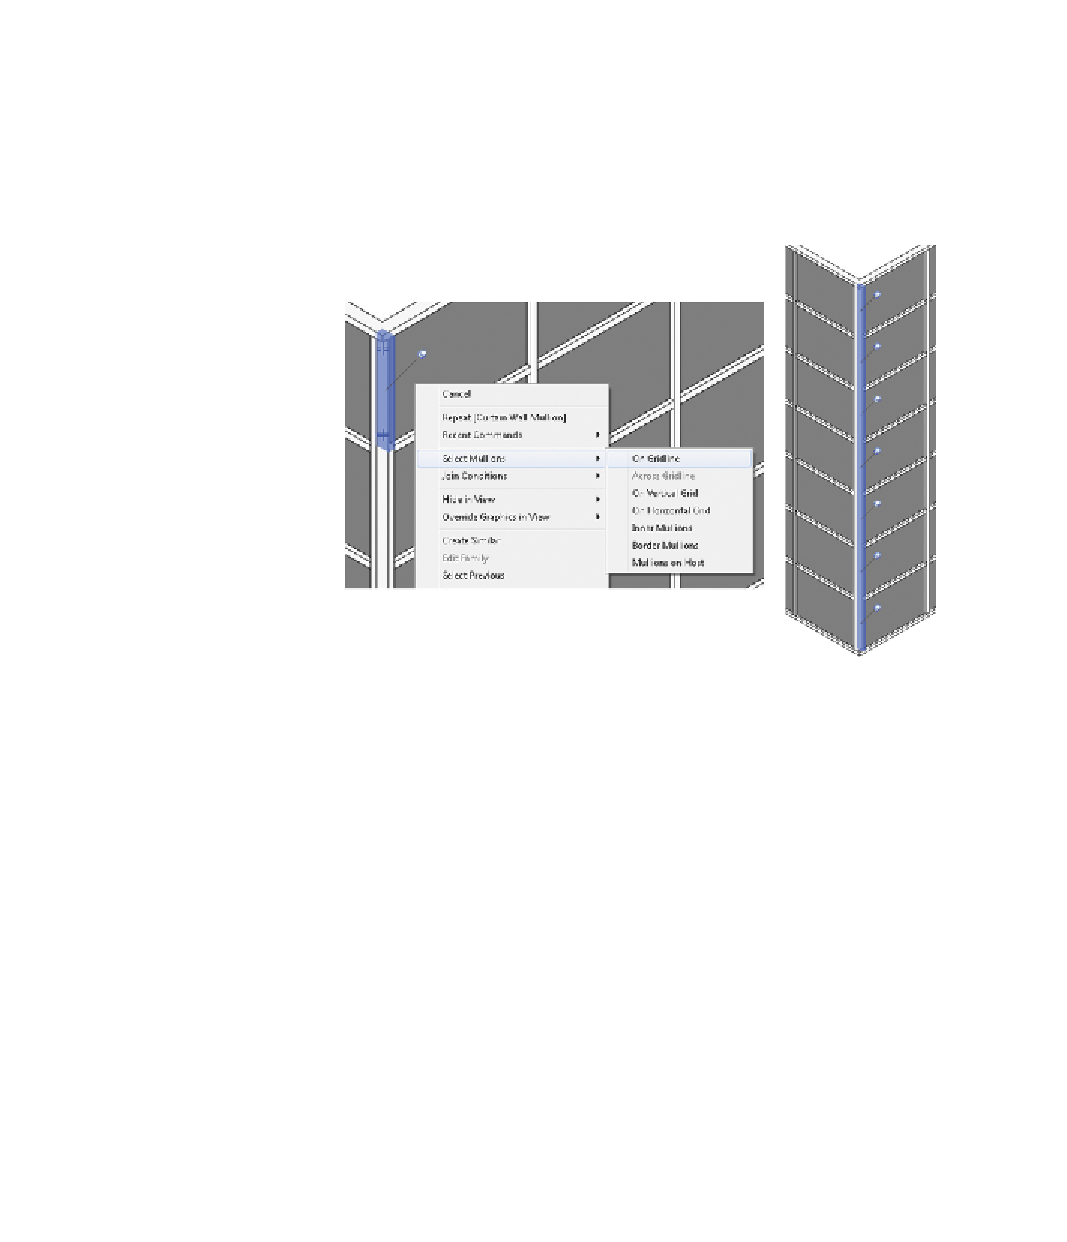
From the 3D view hover the cursor over one of the border curtain
mullions (it doesn't matter which you choose). Press the Tab key until
the mullion is highlighted; then left-click to select it. While the mul-
lion is selected, right-click and choose Select Mullions
➣
On Gridline.
This will select every mullion on this last grid line (Figure 2.23).
FigUre 2.23
Mullions selected on grid line
7.
Notice that the Properties palette shows the rectangular mullion type
as grayed out. You can't simply swap it by default, because the type
properties of the curtain wall define this type. In order to override
the type, you need to first unpin the mullions. On the ribbon in the
Modify panel click the Unpin tool.
8.
Every curtain wall mullion on this grid line is now unpinned (and
still selected). You don't need curtain mullions at both borders, so
you can delete these. Since you unpinned them in the last step, you
can simply press the Delete key.
9.
Repeat step 6 to select the remaining border mullions along the grid
line. Then use the Unpin tool again. For these you want to change the
curtain mullion type from the Type Selector. Change the curtain wall
mullions to L Corner Mullion : 5″ 5″ Corner. Now the corner condi-
tion should look similar to the one in Figure 2.24.


Search WWH ::

Custom Search