Graphics Programs Reference
In-Depth Information
2.
Select this command, and then hover over the wall.
You are prompted to create a rectilinear opening with two clicks,
as shown in Figure 2.15 on the right.
3.
Create two wall openings anywhere in the arc wall.
When the wall opening is selected, the Properties palette will dis-
play constraints such as Top Offset and Base Offset. This allows input
for exact dimensions to modify the opening size and location.
4.
Set the Base Offset to
1
′-0″ for one of the wall openings.
5.
If you need to delete an opening, hover over the opening edge and
select it (or use the Tab key to toggle the selection) and then press the
Delete key.
Splitting Walls
Sometimes, after you've created walls, you realize that you don't need an
inner segment—or you need to change a segment to another wall type. The
process of deleting and re-creating walls would be tedious work. However,
Revit Architecture offers a Split Element tool on the Modify tab of the ribbon
that allows you to divide walls, effectively breaking them into smaller pieces.
This can be done along both horizontal and vertical edges of either curved or
straight walls (Figure 2.16).
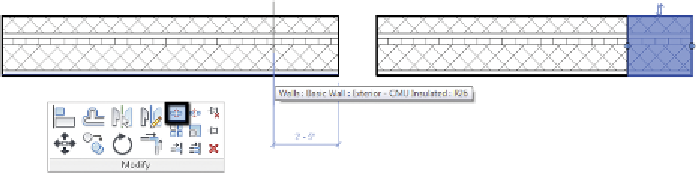
FigUre 2.16
Splitting walls, before and after
Swapping Walls
Swapping walls for different types prevents the rework of deleting them and
creating new ones. Doing so is as easy as selecting a wall and then selecting
the new type from the Properties palette (Figure 2.17). This is especially useful
early in the design process, when the exact wall type is likely to be unknown.
Generic or placeholder wall types can be used and then swapped later on when
the design progresses.


Search WWH ::

Custom Search