Graphics Programs Reference
In-Depth Information
4.
Move your mouse back into the canvas and hover over the center of
the interior walls until you see a blue highlight in the center of the
interior walls. Click to continue your dimension string. Repeat for
each interior wall.
5.
Return to the Options Bar and change the placement from Wall
Centerlines to Wall Faces. Click the inside face of the exterior wall to
finish adding dimensions to your dimension string.
6.
Move your mouse above the interior wall and click to place the dimen-
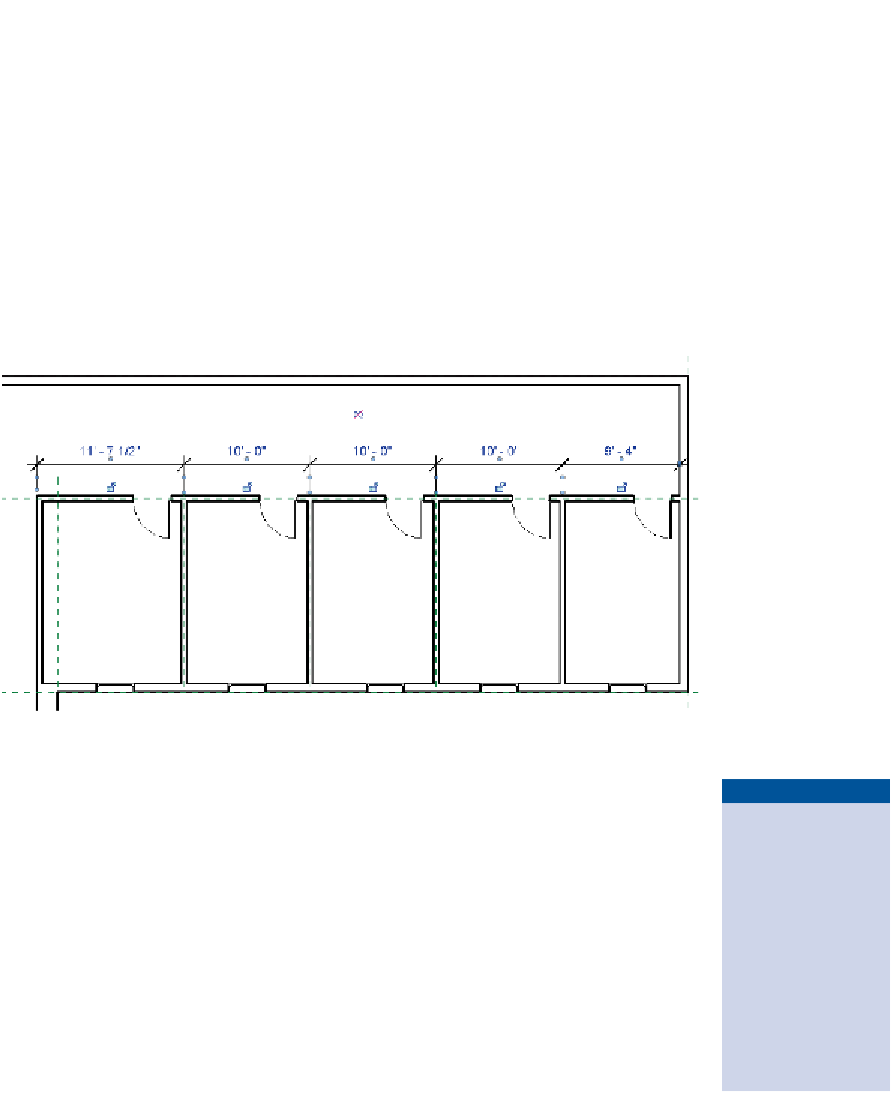
sion string in the view. The results should resemble Figure 1.17.
FIgUre 1.17
The dimensions of the interior walls
7.
After placing the dimension string, notice the blue EQ icon that appears.
This is a valuable shortcut for spacing your elements evenly. Click this
icon and your walls will automatically space themselves evenly.
If you want to see
the actual dimension
values instead of EQ in
your dimension strings,
right-click the dimen-
sion string and select
EQ Display to toggle
between the two set-
tings. You should see
the EQ icon display
anytime you select a
dimension string.
8.
You will most likely get an error because of a door overlapping with
a wall. Disregard this warning by closing the small dialog that opens
in the lower-right corner. We will use temporary dimensions to help
space the doors in the next step. Click the Esc key twice to exit the
Dimension tool.
9.
Select the rightmost door, and notice the light-blue dimensions that
appear. These are called temp dims and are very helpful for locating
doors and windows relative to walls. Notice that this door is 2′-6″ (.76m)
from the wall. This is perfect; leave it as is.


Search WWH ::

Custom Search