Graphics Programs Reference
In-Depth Information
▶
7.
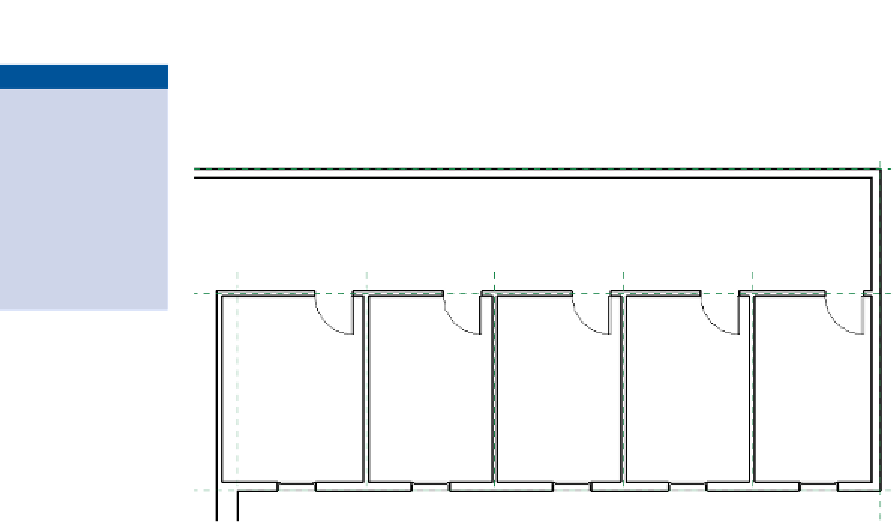
Repeat the same steps to place windows along the exterior wall for
each of the interior rooms. When you finish, the results should
appear similar to Figure 1.16.
If you happen to place
a door or window and
you want to change the
door swing or the glass
placement, just select
the element and press
the spacebar. Revit will
flip the orientation of
the family.
FIgUre 1.16
The Windows for the rooms
This concludes Exercise 1.10. You can compare your results with the sample
ile
c01-ex-01.10end.rvt
.
exercise 1.11: Space elements equally
In this exercise, you'll use dimensions and temporary dimensions to create an
equally spaced relationship between the interior walls, then the doors, and then
the windows. This will illustrate the idea of using constraints to create design
intent. This is a fundamental concept of Revit's parametric modeling.
Open the file
c01-ex-01.11start.rvt
to begin this exercise.
1.
From the Annotate tab in the ribbon, locate the Dimension panel,
and click the Aligned Dimension tool. In the Options Bar, notice that
the Placement drop-down is set for Wall Centerlines. Click in this
drop-down and change the placement to Wall Faces.
2.
Hover your mouse over the leftmost interior wall, and you should see
the outside edge highlight. Click to start a dimension string.
3.
Return your attention to the Options Bar and change the placement
from Wall Faces to Wall Centerlines.


Search WWH ::

Custom Search