Graphics Programs Reference
In-Depth Information
4.
In either view, find the Navigation bar, click the drop-down arrow
under the Zoom icon, and then click Zoom All To Fit. You can also
use the keyboard shortcut
ZA
.
5.
Find the Modify button at the far left side of the ribbon. Click the
Select button under the Modify button and a drop-down appears.
Make sure that the Select Elements By Face option is checked. This
will enable easier selection of walls.
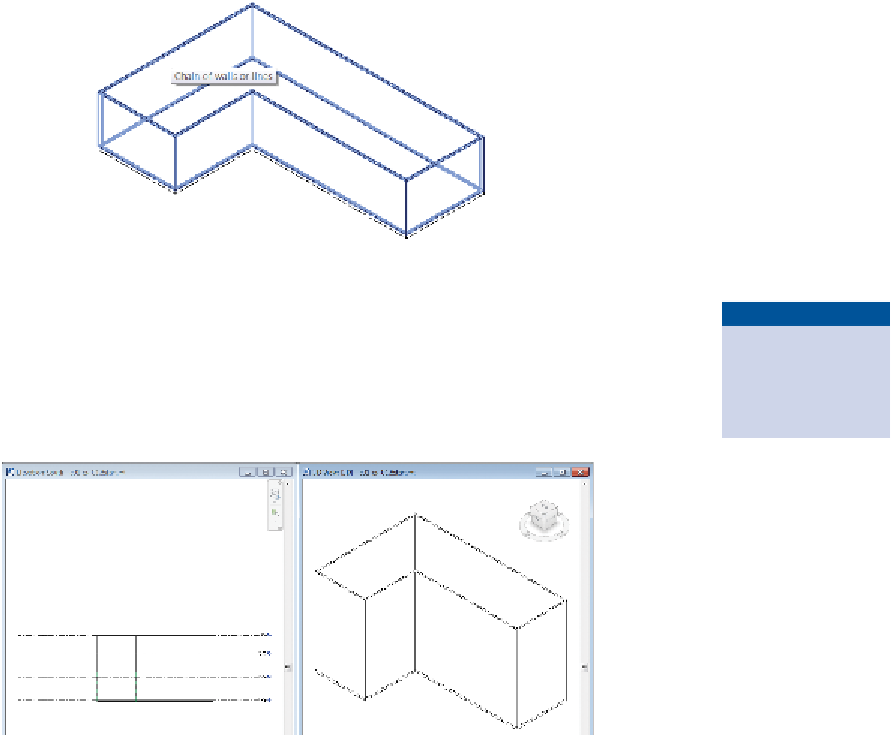
6.
Click inside the 3D view window to activate the view. Hover the mouse
pointer over any of the walls. Press the Tab key once, and all of the walls
should highlight, as in Figure 1.9. The status bar should indicate “Chain
of walls or lines.” Click the mouse once to select the chain of walls.
FIgUre 1.9
Highlighted walls of a chain selection
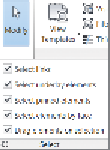
7.
With the walls still selected, turn your attention to the Properties
palette. Find the parameter Top Constraint. Change the value to Up
To Level: Roof, and then click Apply, or move your mouse into the
canvas to automatically apply it. Notice how the walls change height
in both the 3D view and the elevation view (Figure 1.10).
Use the chain-select
method on anything
from walls to lines in
sketches to detail lines.
FIgUre 1.10
Tiled windows show the result of modifying the top constraints of the walls.


Search WWH ::

Custom Search