Graphics Programs Reference
In-Depth Information
7.
If you are using a mouse, then the scroll wheel is ideal for zooming in
and out. If you don't have a mouse, the Zoom controls are all under
the magnifying glass near the ViewCube.
8.
Once you've navigated the view and you're satisfied with the cam-
era angle, it is important to save the current viewpoint. Hover your
mouse anywhere over the ViewCube and right-click. Select the Save
View option from the context menu. Name your view (preferably
something specific), and click OK.
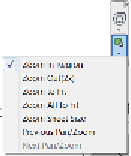
If you've zoomed in too
far and want to Zoom
To Fit, double-click the
middle mouse but-
ton. You can use the
keyboard shortcut ZE
to Zoom Extents of the
current view or ZA to
Zoom All (if you have
many views open).
9.
This will save the angle but not the zoom level. If you want to main-
tain a certain zoom level, use the View Crop commands covered in
steps 6 and 7 of the previous exercise to limit the view to what is most
relevant.
This concludes Exercise 1.4. You can compare your results with the sample
ile
c01-ex-01.4end.rvt
.
Creating a Simple Layout
In this section, you'll use the Revit Architecture interface to complete basic
modeling workflows. You can apply the basic concepts in these exercises to a
variety of tools throughout the program.
exercise 1.5: Create a Floor
To begin, open the file
c01-ex-01.5start.rvt
from the files you downloaded at
the beginning of this chapter.
1.
The project opens in a floor plan view. There are a series of green
reference planes for you to use as guides for this exercise. Click the
Architecture tab of the ribbon, and find the Floor tool in the Build
panel; click the Floor tool to enter Floor sketch mode.
2.
Note that the ribbon adjusts to indicate that you are in a sketch
mode. The most obvious indication is the Mode panel with the red X
and green check mark icons. These allow you to cancel out of sketch
mode or commit your changes. You need to draw your floor shape
before you click the green check mark.
3.
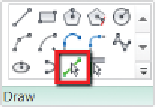
The Draw gallery to the right of the Mode panel has many different
drawing tools. You'll use the Pick Lines tool since there are reference
lines already in place. Click the second-to-last icon in the lower-right
corner of the Draw gallery.


Search WWH ::

Custom Search