Graphics Programs Reference
In-Depth Information
6.
Select the view again, and then click the Edit Crop button from the
contextual panel on the ribbon. Now you are in a sketch mode where
the crop region boundary lines are pink and the rest of the model is
visible but grayed out. This is very similar to editing a floor sketch
boundary. Note the Draw panel in the ribbon.
7.
Select the Line tool. Draw two lines and then trim them to form an
L-shaped crop that excludes the kitchen door.
8.
When your screen is similar to Figure 12.25, click the green check
mark to finish editing the sketch.
FigUre 12.25
An L-shaped crop region
9.
Now turn off the visibility of the crop region by clicking the Hide
Crop Region button. The View Control Bar at the bottom of the can-
vas has many useful buttons; the one we care about has a crop sym-
bol and a light bulb.
10.
Click this, and notice that the crop region is no longer visible, but it
is still masking unwanted areas.
11.
Finally, right-click and choose Deactivate View. This is a simple exam-
ple, but adjusting crop regions in the context of other views on sheets
is an essential Revit skill you'll use often. The finished plan is shown
in Figure 12.26.
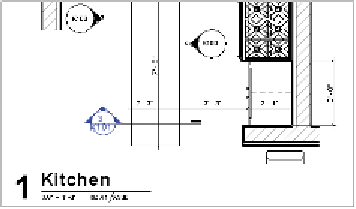
FigUre 12.26
Finished enlarged plan


Search WWH ::

Custom Search