Graphics Programs Reference
In-Depth Information
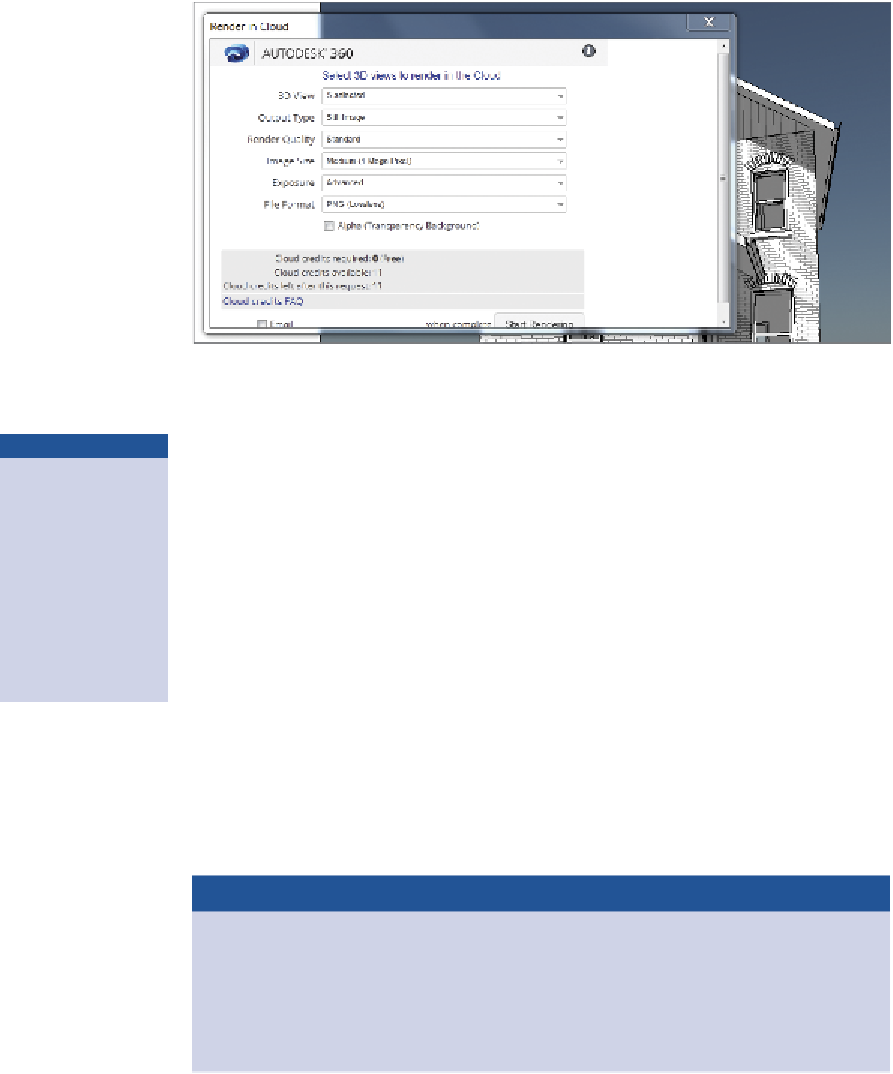
Figure 9.15
Render In Cloud options
4.
Click the Start Rendering button at the bottom of the dialog. Revit
will process for a few moments as your model is uploaded to the cloud
service. Then you'll be able to work on modeling while the renderings
are finished on another machine.
▶
When the Render
in Cloud Exposure
property is set to
Native, the Revit
view-rendering
setting for Exposure
will be used instead
of the default
cloud- rendering
Exposure setting.
5.
In a few minutes, you will get an e-mail, or your communication cen-
ter will notify you that your renderings are ready. Click the Render
Gallery button on the ribbon and review your new rendered images.
6.
You can get these renderings back into your Revit project by saving
them from the cloud onto your desktop. Then duplicate the Back of
House view from the Renderings node of the Project Browser. Rename
the copied view
Cloud Cover Shot
. Delete the old rendering, and import
one of the new renderings as an image file to the blank drafting view.
This concludes Exercise 9.8. You can compare your results with the sample
ile
c09-ex-09.8end.rvt
in the files you downloaded earlier.
Now You Know
In this chapter, you learned how to render in three different ways and create presentation
graphics in elevation and 3D views. You applied various Graphic Display Options to achieve a
sketchy design look. You also used the Displace Elements tool to create exploded axonometric
views. Using these techniques, you can visualize your model in interesting ways: for presenta-
tions, for working on a detail, or for communicating construction methods.


Search WWH ::

Custom Search