Graphics Programs Reference
In-Depth Information
4.
Click the Modify button or press the Esc key to exit the Room
command, and then select the room tag.
5.
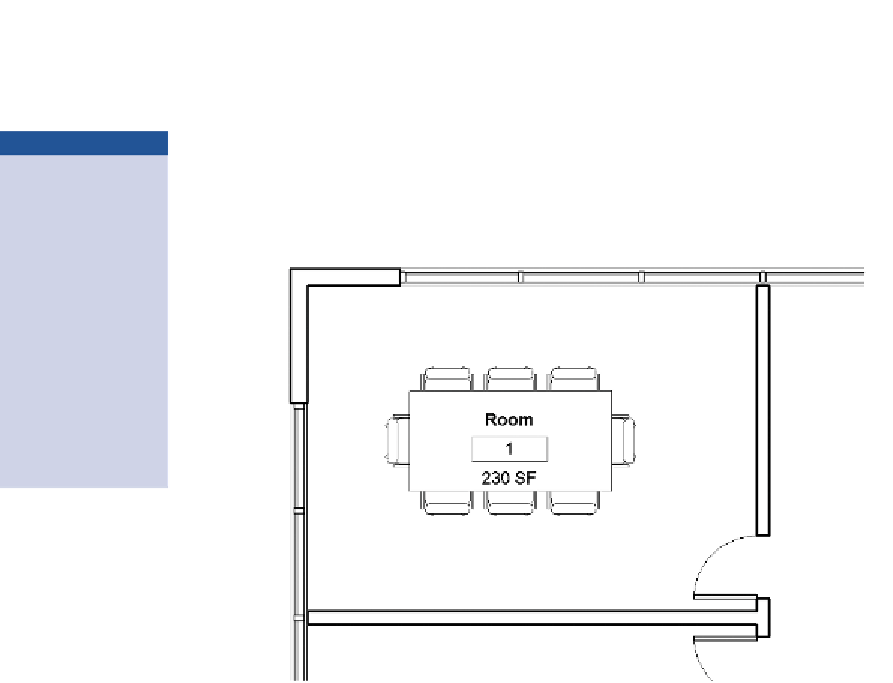
Choose the Room Tag With Area option from the Type Selector in
the Properties palette. The room tag shows the area based on your
project units (Figure 8.5). In this case, the room is 230 square feet
(21 square meters).
▶
The area feature of the
room tag is incredibly
helpful, because you can
constantly confirm that
your spatial program
requirements are being
maintained as your
design develops. As
locations of walls are
modified, the room
object will adjust
accordingly and display
the recalculated area
values.
Figure 8.5
Room tag with area
6.
Select the first room you created by finding the set of invisible
crossing vectors, and examine its properties in the Properties pal-
ette. You can modify the room name and number here by editing
the settings under Identity Data or by directly editing the Name and
Number values in the room tag. It doesn't matter where you modify
the data, because it is all stored in the room object. This makes it
easy to create various plan diagrams to suit your needs.
▶
You can change the
automatic numbering
of rooms by editing the
room number of the
first one placed and
then continue placing
others.
7.
Change the name of the room to
Small Meeting
, and change the
number to
101
.
8.
Place some other rooms within the floor plan, and observe how the
numbering scheme has changed.
9.
Select the wall at the right edge of the Small Meeting room, as shown
in Figure 8.6, and move it 2
′
-0
″
(600 mm) to the left.


Search WWH ::

Custom Search