Graphics Programs Reference
In-Depth Information
FIgure 7.9
Place a solid wall by face.
3.
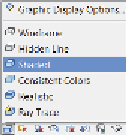
It is difficult to differentiate the mass from the Revit wall. To show
which walls have been created and which still need to be placed,
adjust the graphics by changing the visual style from Hidden Line to
Shaded.
4.
Open the Visibility/Graphic Overrides dialog by typing the shortcut
VG
. Find the Floors category, and uncheck the box next to it.
5.
Also in the Visibility/Graphic Overrides dialog, find the Mass category
and click into the cell in the third column titled Transparency; then
click again to make the Surfaces dialog appear. Set the Transparency
value to
50
. Click OK.
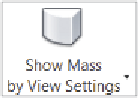
6.
Also in the Visibility/Graphic Overrides dialog, expand the Mass
node. Uncheck the box next to the Mass Floor subcategory. Click OK
to confirm all of these changes to the Visibility/Graphic Overrides
dialog. Make sure that the Massing & Site tab has the Show Mass By
View Settings button enabled.
7.
Now the mass and walls are distinguishable. Click the Massing & Site
tab, choose the Wall By Face tool, and click to place walls until the
volume in the middle of the mass looks like Figure 7.10.
This concludes Exercise 7.7. You can compare your results with the sample file
c07-ex-07.7end.rvt
.


Search WWH ::

Custom Search