Graphics Programs Reference
In-Depth Information
4.
Select the Ceiling tool on the Architecture tab, and pick inside the
rooms shown in Figure 3.29 to automatically place the ceilings.
Notice that Revit Architecture centers the grid based on the space
you've selected.
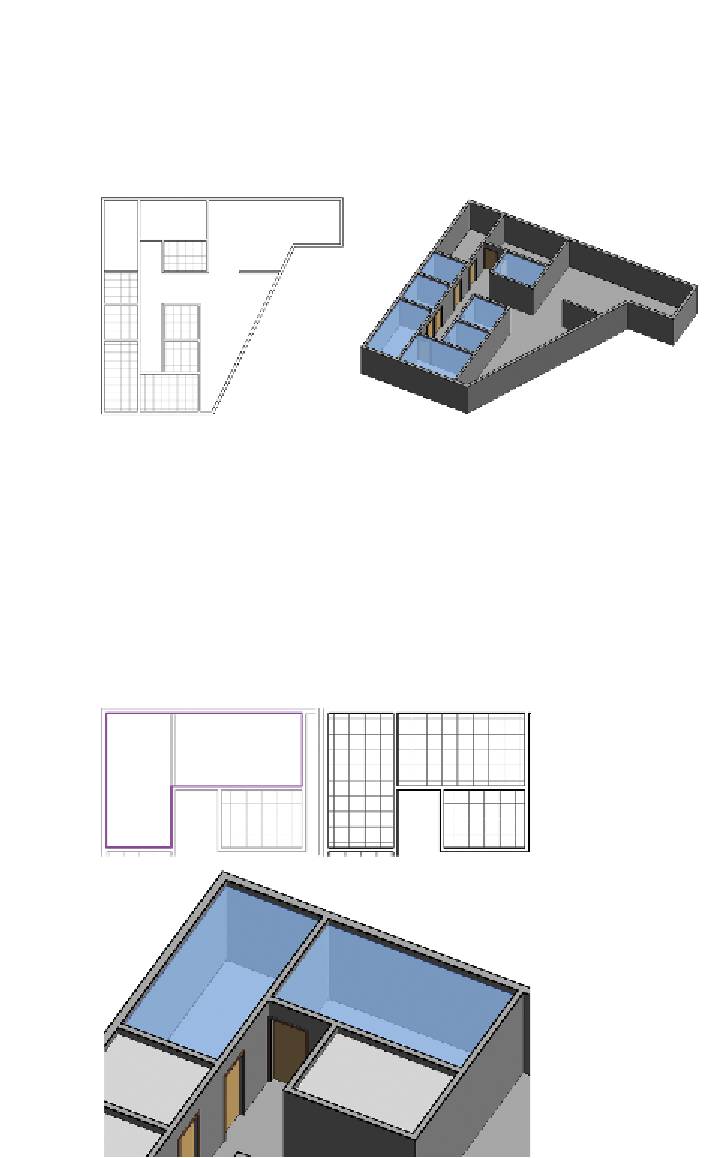
Figure 3.29
Resulting automatic placed ceilings
5.
Next, you'll place ceilings in the upper-left corner of the ceiling plan
for Level 1, but this time you'll share the ceiling between the two
spaces. This practice is common in interior projects. The partitions
extend only to the underside of the ceiling (rather than connect to
the structure above). Select Sketch Ceiling on the Ceiling panel of the
Modify | Place Ceiling tab. Add sketch lines as shown in the first image
in Figure 3.30. The result is shown in the second image.
Figure 3.30
Sketching the ceiling


Search WWH ::

Custom Search