Graphics Programs Reference
In-Depth Information
exercise 3.7: Create a roof by extrusion
download the files for Chapter 3, and open the file
c03-ex-3.7start.rvt
.
1.
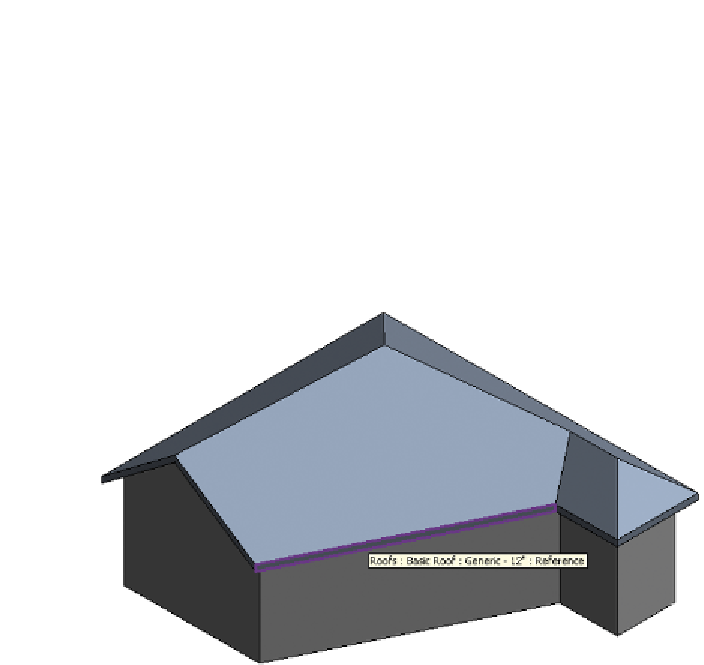
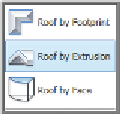
Select the Roof by Extrusion command from the Roof flyout on the
Architecture tab. The Work Plane dialog should prompt you to specify
a new work plane. Choose the Pick a plane option and select the roof
face highlighted in Figure 3.19.
Figure 3.19
Selecting the roof face
2.
You're prompted to associate the roof to the appropriate level. This
step is important for scheduling purposes; you can modify the value
later. For now, select Level 3 because it's closest to the base of the
extruded roof.
3.
Next, you'll create the sketch for the extruded roof. The sketch line
isn't a closed loop: It's just a line (or series of connected lines) that
defines the top of the extruded roof. For this example, you'll create an
arc. Select any of the Arc tools from the Draw panel.
4.
Create the arc approximately as shown in Figure 3.20. When you've
finished drawing the arc, set Extrusion End in the Properties palette
to
20
′
-
0
″
(
6100
mm).


Search WWH ::

Custom Search