Game Development Reference
In-Depth Information
The exporter window should now be on screen, and as you can see there are a great
many options available. We can do without most of them for now, so we'll only
cover the ones we need in order to export a non-animated 3D model.
The first thing we need to set is the
Current Project
field. The exporter maintains a
list of projects that, at its simplest level, is just a quick way of choosing a directory
where the exported model files will be created.
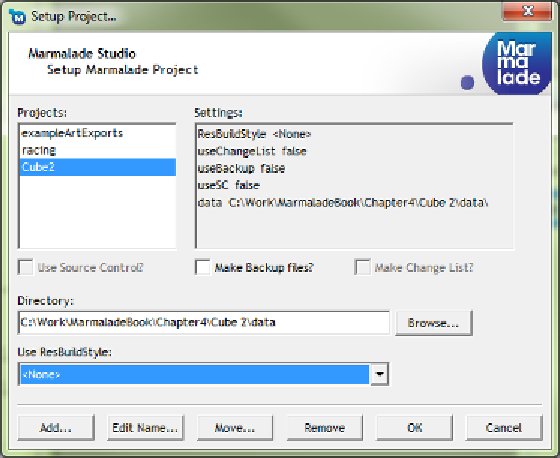
Since we've not yet created an exporter project, let's do so by clicking on the button
labeled
Set Project
. The following dialog will appear:
To create a new project click on the
Add…
button at the bottom of the dialog
and you will be prompted to enter a name for the project. Once you've accepted
the name, the project will appear in the
Projects:
list.
Click on the
Browse…
button and locate the
data
directory in our code project.
All resource files need to reside with our code project's
data
directory; this will
make exporting model files to the correct place much easier.
For now we will ignore the other settings in this dialog as they are beyond the
scope of this chapter; so click the
OK
button to return to the main exporter
window, which should now have our newly created project selected in the
Current Project
drop-down list and the
data
directory we set above in the
Project Data Directory
field.


Search WWH ::

Custom Search