Database Reference
In-Depth Information
5
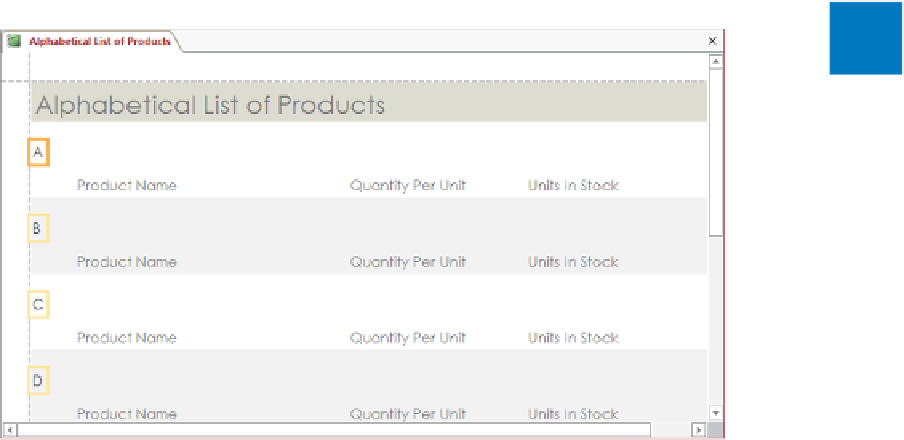
Below the title, click
ProductName by 1s
, and press the
Delete
key to remove that
label from all the group headers.
6
Click the control containing
A
, and drag it to the left edge of the header. Notice that
when you release the mouse button, all the corresponding controls move to the
corresponding location in their own group headers.
KEYBOARD SHORTCUT
Press the Arrow keys to move the selected control in small
increments. When the shadow box is positioned where you want it, click away from
the control. For a list of keyboard shortcuts, see “Keyboard shortcuts” at the end of
this topic.
7
Point to the right border of the selected
A
control, and when the pointer changes to
a double-headed arrow, drag to the left until the control is just big enough to hold
its contents. Notice that this action changes the size of all the corresponding controls.
5
It is easier to work with the controls in the group header when the report details are hidden.
Let's consolidate the controls in the group header so that they require less room.
8
With the
A
control still selected, hold down the
Ctrl
key, and in turn, click the
Product Name
,
Quantity Per Unit
, and
Units In Stock
label controls to add them to
the selection.
9
On the
Design
tab, in the
Tools
group, click the
Property Sheet
button to open the
Property Sheet
pane.