Game Development Reference
In-Depth Information
essentially the same thing we did in
BobTest
, but this time we render targets instead. Next, we
render the ball and the cannon, as we did in the
CollisionGravityTest
.
The only thing to note here is that we change the drawing order so that the ball will always be
above the targets and the cannon will always be above the ball. We also color the targets green
with a call to
glColor4f()
.
The output of this little test is exactly the same as in Figure
8-17
, so we can spare ourself the
repetition. When we fire the cannonball, it will plow through the field of targets. Any target that
gets hit by the ball will be removed from the world.
This example could actually be a nice game if you polish it up a little and add some motivating
game mechanics. Can you think of additions? Play around with the example a little to get a
feeling for the new tools we have developed over the course of the last couple of pages.
There are a few more things to discuss in this chapter: cameras, texture atlases, and sprites.
These use graphics-related tricks that are independent of our model of the game world. Time to
get going!
A Camera in 2D
Up until now, we haven't had the concept of a camera in our code; we've only had the definition
of our view frustum via
glOrthof()
, like this:
gl.glMatrixMode(GL10.
GL_PROJECTION
);
gl.glLoadIdentity();
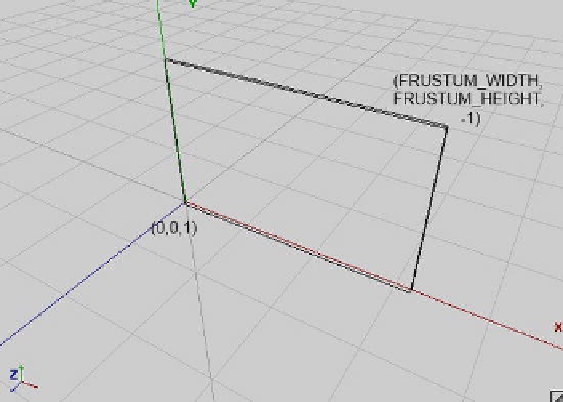
gl.glOrthof(0, FRUSTUM_WIDTH, 0, FRUSTUM_HEIGHT, 1, -1);
From Chapter 7, we know that the first two parameters define the x coordinates of the left and
right edges of our frustum in the world, the next two parameters define the y coordinates of
the bottom and top edges of the frustum, and the last two parameters define the near and far
clipping planes. Figure
8-19
shows that frustum again.
Figure 8-19.
The view frustum for your 2D world, again