Game Development Reference
In-Depth Information
WindowManager.LayoutParams.
FLAG_FULLSCREEN
);
setContentView(
new
RenderView(
this
));
}
}
Did you create that mental image already? Then let's analyze the
RenderView.onDraw()
method
quickly. The rest is the same as in the last example.
We start off by filling the screen with the color white. Next we draw a line from the origin to
the bottom-right pixel of the screen. We use a paint that has its color set to red, so the line
will be red.
Next, we modify the paint slightly and set its style to
Style.STROKE
, its color to green, and its
alpha to 255. The circle is drawn in the center of the screen with a radius of 40 pixels using the
Paint
we just modified. Only the outline of the circle will be drawn, due to the
Paint
's style.
Finally, we modify the
Paint
again. We set its style to
Style.FILL
and the color to full blue.
Notice that we set the alpha to 0x77 this time, which equals 119 in decimal. This means that the
shape we draw with the next call will be roughly 50 percent translucent.
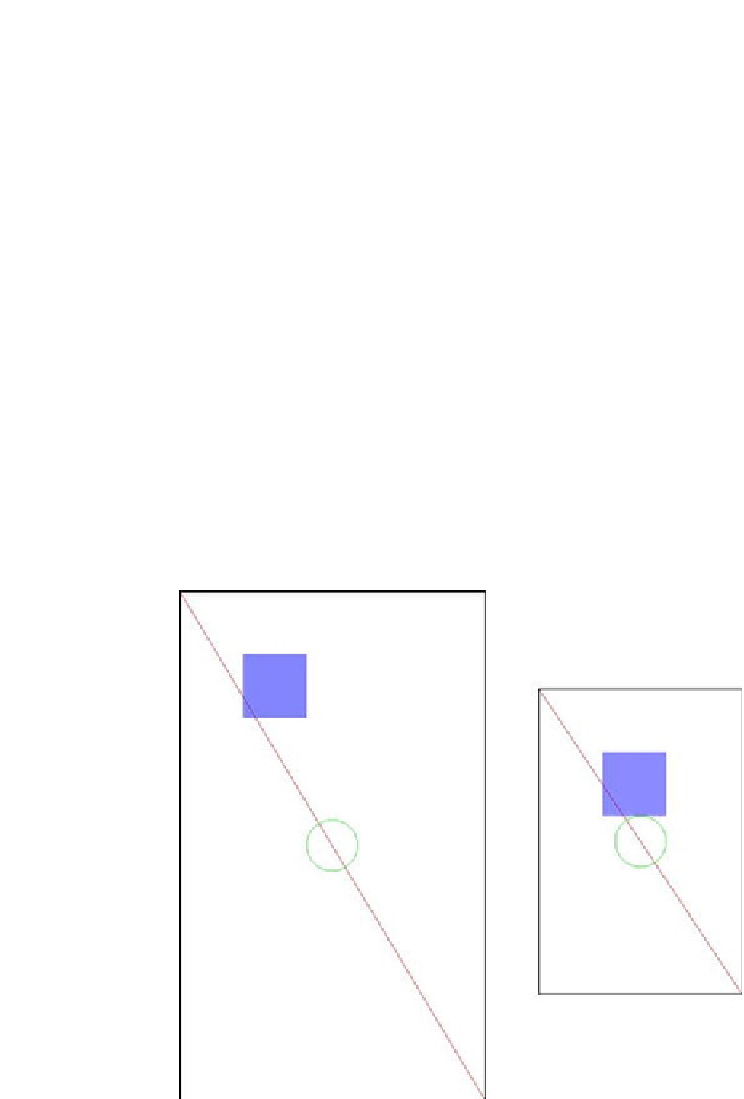
Figure
4-13
shows the output of the test activity on 480×800 and 320×480 screens in portrait
mode (the black border was added afterward).
Figure 4-13.
The ShapeTest output on a 480×800 screen (left) and a 320×480 screen (right)
Oh my, what happened here? That's what we get for rendering with absolute coordinates and
sizes on different screen resolutions. The only thing that is constant in both images is the red
line, which simply draws from the top-left corner to the bottom-right corner. This is done in a
screen resolution-independent manner.