Game Development Reference
In-Depth Information
Many of the previous manifest elements we've discussed are used as filters, including
<uses-feature>
,
<uses-sdk>
, and
<uses-permission>
. The following are three more elements that
are specific to filtering that you should keep in mind:
�?�
<supports-screens>
: This allows you to declare the screen sizes and
densities your game can run on. Ideally, your game will work on all screens,
and we'll show you how to make sure that it will. However, in the manifest
file, you will want to declare support explicitly for every screen size you can.
�?�
<uses-configuration>
: This lets you declare explicit support for an input
configuration type on a device, such as a hard keyboard, QWERTY-specific
keyboard, touchscreen, or maybe trackball navigation input. Ideally, you'll
support all of the above, but if your game requires very specific input, you
will want to investigate and use this tag for filtering on Google Play.
�?�
<uses-library>
: This allows for the declaration that a third-party library,
on which your game is dependent, must be present on the device. For
example, you might require a text-to-speech library that is quite large, but
very common, for your game. Declaring the library with this tag ensures that
only devices with that library installed can see and download your game.
A common use of this is to allow GPS/map-based games to work only on
devices with the Google Maps library installed.
As Android moves forward, more filter tags are likely to become available, so make sure to check
the official Google Play filters page at
http://developer.android.com/guide/google/play/
filters.html
to get up-to-date information before you deploy.
Defining the Icon of Your Game
When you deploy your game to a device and open the application launcher, you will see that its
entry has a nice, but not really unique, Android icon. The same icon would be shown for your
game on Google Play. How can you change it to a custom icon?
Have a closer look at the
<application>
element. There, we defined an attribute called
icon
.
It references an image in the
res/drawable-xxx
directory called
icon
. So, it should be obvious
what to do: replace the icon image in the
drawable
folder with your own icon image.
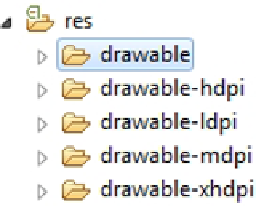
Following through the eight easy steps to create an Android project, you'll see something similar
to Figure
4-1
in the
res/
folder.
Figure 4-1.
What happened to my res/ folder?