Graphics Reference
In-Depth Information
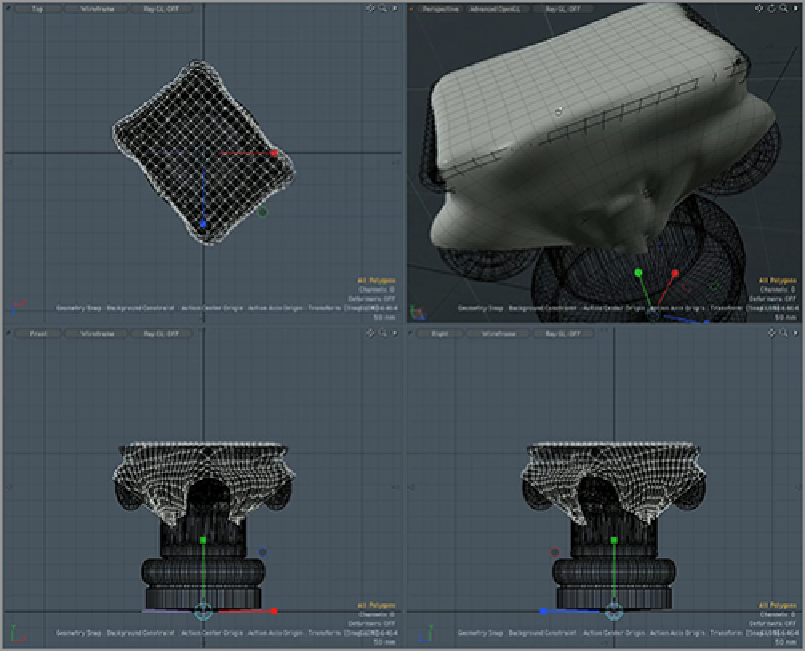
1.
Enable snapping and turn on a background constraint.
2.
Use the Scale tool with the action Center set to origin, and scale the object uniformly toward the
origin (by using the cyan-colored scale handle at the center of the tool).
3.
After all of the polygons in the object have reached a collision point with the pedestal, scale up on
the y-axis to decrease the amount of stretching on the lower part of the cloth.
When this is completed, your object should look something like
Figure 5-17
.
Figure 5-17:
Rough initial cloth placement
With this initial placement created, you're now ready to place a more accurate top section and then move
on to sculpting:
1.
Start by selecting a group of polygons in the middle of the cloth (see
Figure 5-18
).
2.
Use the Shift+up-arrow key combo to increase the selection so that it includes the entire top of the
cloth (see
Figure 5-19
)
.
3.
Now cut out this section of geometry. You will replace this with a more form-fitting version.
Figure 5-18:
The initial selection for the top section of the cloth