Graphics Reference
In-Depth Information
Creating a Basic Lighting Setup
Now you will look at how to set up the lighting in a simple scene. To start off with a firm grasp of lighting
concepts, you will first explore lighting using traditional lights alone and then move on to more complex
lighting schemes. The ability to light a scene properly by using traditional lights is key to understanding the
lighting process and the tools at hand. In this section, you will create a simple three-point lighting scheme.
After the lighting rig is created, you will move on to see how this setup can be adapted to provide a wide
variety of lighting options.
Using Three-Point Lighting
Three-point lighting
is a common technique in photo, film, and 3D. As the name suggests, the light that is
set up (or rigged) consists of three elements: the key light, the fill light, and the rim light. The key light
provides the majority of the illumination for the scene and is typically positioned in front of the subject (seen
in
Figure 4-14
)
. The fill light is used to balance out the shadows left by the key light. Finally, the rim light is
added to accentuate the silhouette of the subject. In
Figure 4-15
, the fill light is shown alone. In
Figure 4-16
,
the rim light is demonstrated.
The use of these three lights will allow you to cleanly and evenly illuminate your model. Any two of
these lights will illuminate the model but leave heavy shadows or undefined boundaries.
Figure 4-17
shows
various combinations of these lights.
The fully illuminated model is shown in
Figure 4-18
.
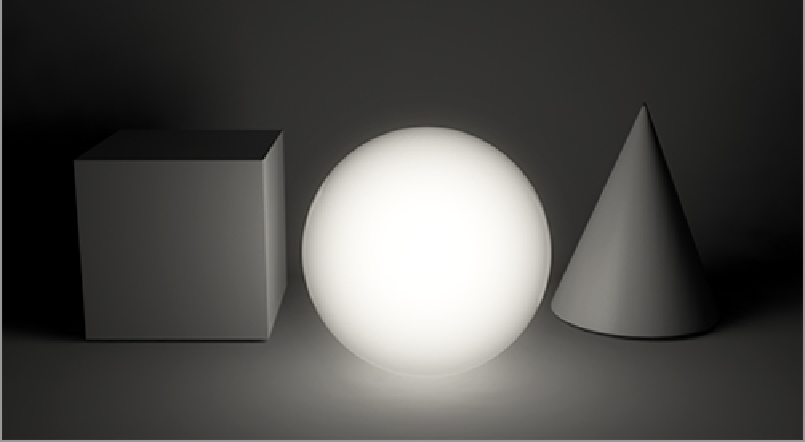
The lighting rig in this image uses a key light behind
and to the left of the camera, a fill light coming from the right side of the camera, and a rim light nearly
opposite the camera and on the far side of the model.
Figure 4-14:
The key light alone in a scene