Java Reference
In-Depth Information
LISTING 12.4
Continued
77: if (buttonAt < 0) {
78: buttonAt = border - 80;
79: }
80: return buttonAt;
81: }
82:
83: public void paintComponent(Graphics comp) {
84: super.paintComponent(comp);
85: ok.setBounds(buttonX, buttonY, 70, 20);
86: }
87: }
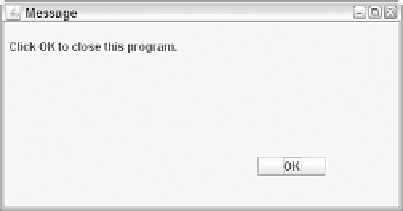
The
MousePrank
class is a frame that holds two components arranged with a border lay-
out—the label “Click OK to close this program.” and a panel with an OK button on it.
Figure 12.4 shows the user interface for this application.
FIGURE 12.4
The running
MousePrank
application.
Because the button does not behave normally, it is implemented with the
PrankPanel
class, a subclass of
JPanel
. This panel includes a button that is drawn at a specific posi-
tion on the panel instead of being placed by a layout manager. This technique was
described at the end of Day 11, “Arranging Components on a User Interface.”
First, the panel's layout manager is set to
null
, which causes it to stop using flow layout
by default:
setLayout(null);
Next, the button is placed on the panel using
setBounds(
Rectangle
)
, the same method
that determines where a frame or window will appear on a desktop.
A
Rectangle
object is created with four arguments: its x position, y position, width, and
height. Here's how
PrankPanel
draws the button:
JButton ok = new JButton(“OK”);
int buttonX = 110;
int buttonY = 110;
ok.setBounds(new Rectangle(buttonX, buttonY, 70, 20));