Graphics Programs Reference
In-Depth Information
2.
This creates a level 1 with 102k faces. What's more important than the total face count is the fact the
geometry is concentrated in areas like the waist, which I will need to twist to create the pose I want.
3.
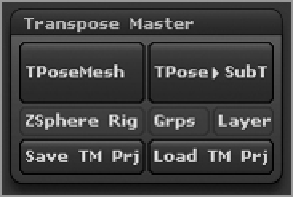
Start Transpose Master by pressing ZPlugin
⇒
Transpose Master
⇒
TPoseMesh to create the Posable
proxy mesh (
Figure 11-46
).
Figure 11-46:
Create the Posable mesh.
Once the model is in TPose, you can use the Transpose tools to pose it. I chose to rotate the torso around
the Y axis as well as bring one of the legs back slightly to suggest the anticipation of a forward motion, as if
the character might be about to take a step. Follow these steps to create this pose (
Figure 11-47
)
.
1.
Press R to enter Transpose Rotate mode. Press Ctrl + Click + drag down the model's torso to mask the
upper body. Rotate around the figure to be sure everything above the waist is masked. Manually mask in
any missed areas (
Figure 11-48
)
.
2.
Ctrl + Click on the background to invert the mask. Ctrl + Click on the mask itself to feather soften the
edge. Press R to enter Transpose Rotate mode and draw a transpose line up the center of the back (
Figure
3.
Rotate to the side view. Click and drag the transpose line to the centerline of the body by clicking on
the circle or line itself. Once the line is placed, click and drag inside the center circle to rotate the torso
around the Y axis (
Figure 11-50
)
.
Figure 11-47:
The posed figure

Search WWH ::

Custom Search