Graphics Programs Reference
In-Depth Information
12.
Now turn both S1 and S2 on and make sure the S2 button is highlighted, indicating that it is the selec-
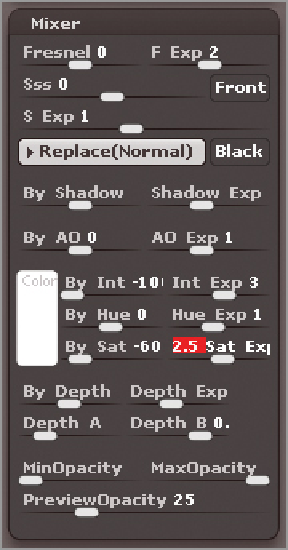
ted shader. Expand the Mixer subpalette and make the following adjustments (
Figure 10-33
):
By Int: -100
Int Exp: 3
By Sat: -60
Sat Exp: 2.5
The By Intensity (By Int) slider sets the strength of the shader based on the intensity or value of the surface
colors: setting this to -100 means that the shader is stronger where the surface is darker. The Intensity
Exponent (Int Exp) controls the smoothness of the transition of the shader. The By Saturation (By Sat)
controls the strength of the shader based on the saturation of the colors on the surface. So by setting this
to a negative value, those parts of the surface that are colored with dark, unsaturated colors will be the
shiniest parts of the surface.
Figure 10-33:
The Mixer settings for the S2 shader
13.
Save the material as “wornLeather.ZMT.”
Paint In the Worn Areas
Now that the basic material is set up, it is time to start painting in the worn areas. The colors that have
already been painted on the surface will serve as a base coat. They are fairly dark reds and oranges and at the
moment the surface looks fairly shiny. In this section, you will paint lighter colors over the surface and you
will see how these lighter areas appear less shiny than the darker areas thanks to our worn leather material.
Search WWH ::

Custom Search