Graphics Programs Reference
In-Depth Information
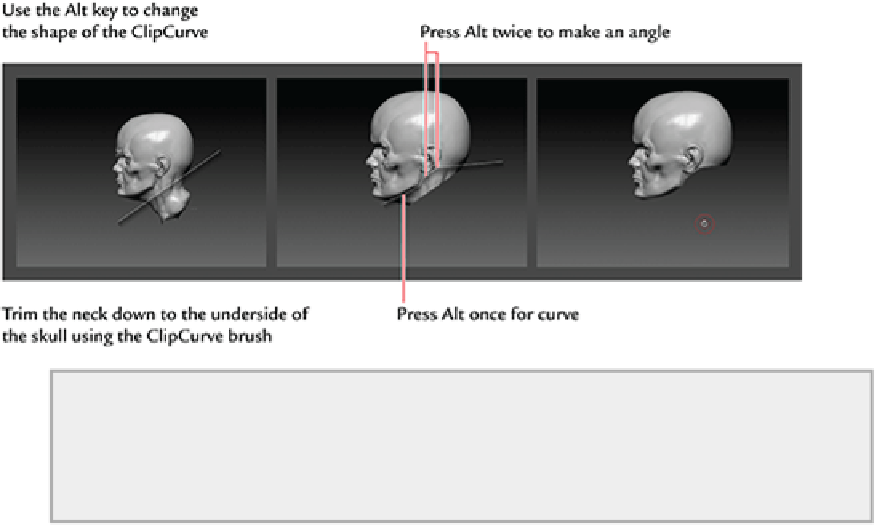
The ClipCurve brushes work by pressing Ctrl + Shift + Click and dragging a line. The shaded
side of the line will be “clipped” from the geometry on the unshaded side of the line, which
will remain unchanged. When you are drawing a clipping line, press spacebar to reposition the
line, press Alt once to insert a curve anchor point in your line, and press Alt twice to insert a
hard angle anchor point.
4.
At this point, we will carve away some negative space at the back of the skull (
Figure 6-5
). This will
help interrupt the viewer's expectation that the cranium will be a solid mass and allow us to play with
adding some interesting mechanical shapes inside to suggest some complex life support system. We will
use the ClipCurve again for this cut.
5.
As a final touch, we will add come cylindrical details using the ClipCircle brush. From the Brush menu,
select the ClipCircle brush. This brush differs from the ClipCurve brush in that it draws a circular clipping
area. Notice there is a crosshair in the center of this circle. We will now use the ClipCircle brush to add
some points on the head where tubes will later insert (
Figure 6-6
)
. The ClipCircle brush has two inter-
esting effects. If the circle is drawn so the center crosshair is outside the geometry, it will carve away a
circular shape. If the crosshair is inside the geometry, it will create a countersunk cylinder shape. Draw the
ClipCircle and make sure the center point is within the geometry to create the tube connectors as shown
(
Figure 6-7
)
.
Figure 6-5:
Carve away the back of head.
Search WWH ::

Custom Search