Graphics Programs Reference
In-Depth Information
Select the specular layer. Adjust the opacity to get the best effect. You may choose to erase some parts
of the layer to reduce the shine in some areas compared to others. You can increase the shininess by adding
another instance of the specular layer. Simply select the whole specular layer with the Ctrl + A hot key, then
press Ctrl + J to jump a new copy up. This will immediately have a visible effect on the image (
Figure 5-27
)
.
Adjust the opacity and erase as needed. Another useful trick is to use the Dodge tool to brighten areas of the
specular layer you want to accentuate (
Figure 5-28
). Set the tool to highlights with a high opacity. This will
brighten highlights as you brush over them. Press Alt to darken as you paint.
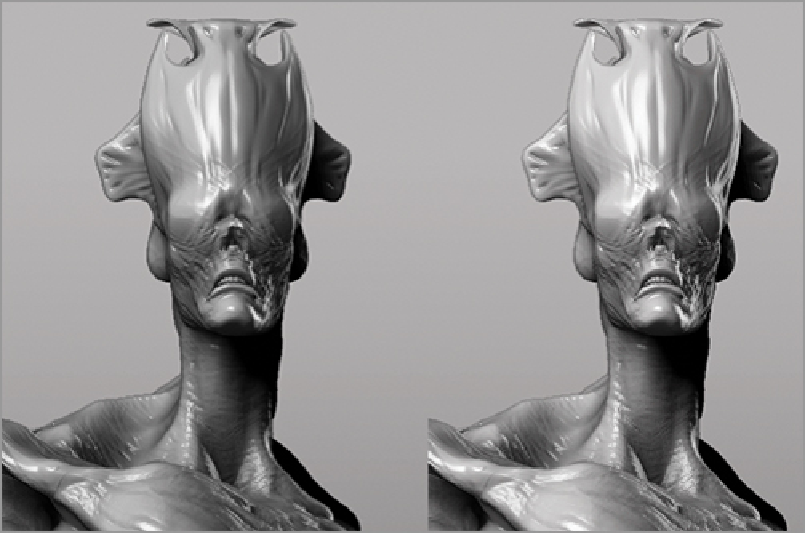
Figure 5-27:
Adjusting the specular shine. The figure on the right has two instances of the specular layer
applied to increase the level of shininess.
Figure 5-28:
Dodge tool settings
Now we are ready to collapse in to a few simple layers to continue working. Follow the steps below to
consolidate the layers into a more manageable working file. This will allow us to simplify the number of
currently active layers we have to deal with while retaining the original layers in group, in case we need
them later.
1.
Turn off visibility on the backdrop and utility layers groups. The figure should be visible against a trans-
parent checkerboard background (
Figure 5-29
)
.
2.
Select the topmost layer and press the hot key Ctrl + Shift + Alt + E. This will collapse all visible layers
into a new layer copy. This retains all the other layers underneath (
Figure 5-30
).
3.
Turn off visibility on all layers but the backdrop group. Again press Ctrl + Shift + Alt + E to collapse
the backdrop into a new copy. Move the backdrop up beneath the figure copy layer.

Search WWH ::

Custom Search