Hardware Reference
In-Depth Information
2.
Open the system. See the system or case instructions for details.
3.
Connect a static guard wrist strap to your wrist and then to a metal portion of the system
chassis, such as the frame. Make sure the metal plate on the inside of the wrist strap is tight
against the skin of your wrist.
4.
Some motherboards feature an LED that glows as long as the motherboard is receiving power.
Wait until the LED dims before removing or installing memory.
5.
Move obstructions inside the case, such as cables or wires, out of the way of the memory
modules and empty sockets. If you must remove a cable or wire, note its location and
orientation so you can replace it later.
6.
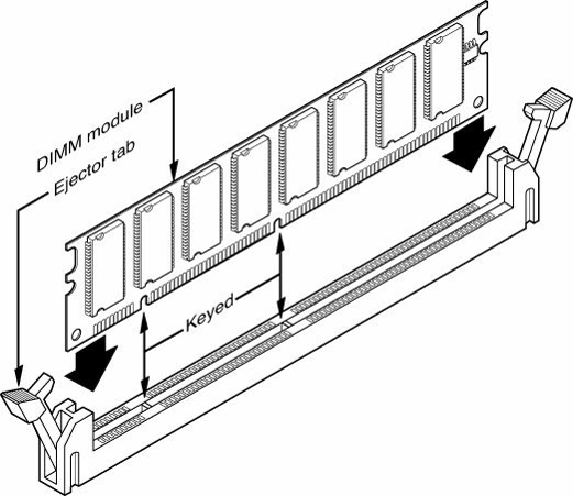
If you need to remove an existing module, flip down the ejector tab at each end of the module
and lift the module straight up out of the socket. Note the keying on the module.
7.
Note the specific locations needed if you are inserting modules to operate in dual-channel
mode. The sockets for dual-channel memory might use a different-colored plastic to distinguish
them from other sockets, but ultimately you should consult the documentation for your
motherboard or system to determine the proper orientation.
8.
To insert a module into a socket, ensure that the ejector tabs are flipped down on the socket you
plan to use. DIMMs are keyed by one or more notches along the bottom connector edges that are
offset from the center so they can be inserted in only one direction, as shown in
Figure 6.19
.
Figure 6.19. DIMM key(s) should match the protrusion(s) in the DIMM sockets.
9.
Push down on the module until the ejector tabs lock into place in the notch on the side of the
module. It's important that you not force the module into the socket. If the module does not slip
easily into the slot and then snap into place, it is probably not oriented or aligned correctly.